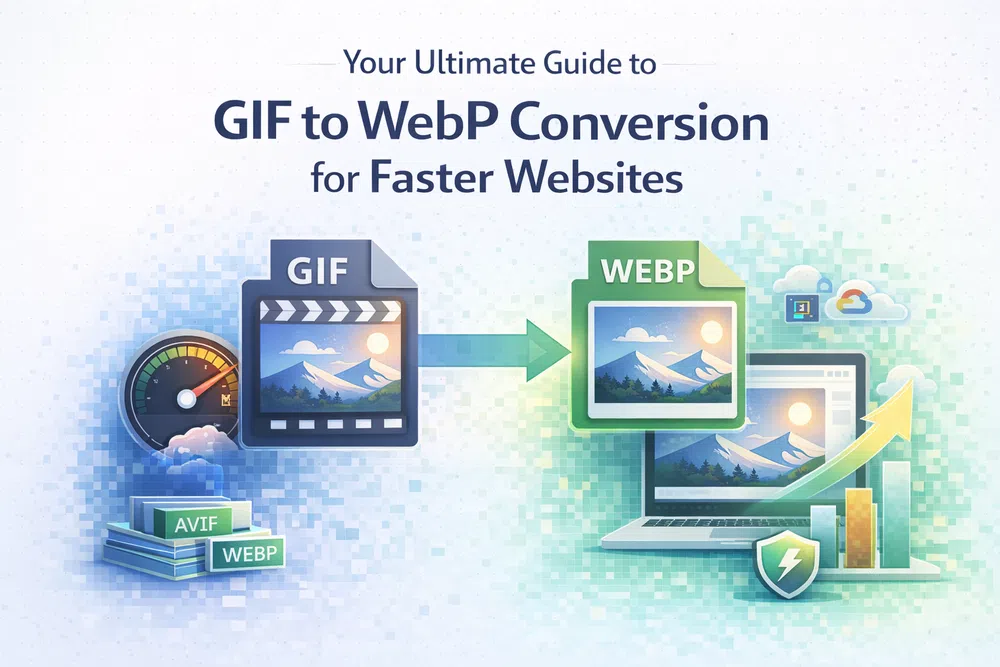
Your Ultimate Guide to GIF to WebP Conversion for Faster Websites
Swapping your GIFs for WebP files is one of the biggest wins you can get for your website's speed. You're basically trading in a clunky, old file format for a sleek, modern one that’s often up to 64% smaller. The best part? You don't lose any of the animation quality. This one change can make a massive difference in how quickly your pages load and how happy your visitors are.
Swapping your GIFs for WebP files is one of the biggest wins you can get for your website's speed. You're basically trading in a clunky, old file format for a sleek, modern one that’s often up to 64% smaller. The best part? You don't lose any of the animation quality. This one change can make a massive difference in how quickly your pages load and how happy your visitors are.
Why GIFs Are Holding Your Website Back
Those animated GIFs you've got on your site? They're probably killing your load times. While they can add a bit of life to your content, they come with a hefty performance price tag. The format is a relic from another era, and its huge file sizes and tiny 256-colour palette are a serious drag on modern web performance.
Think about a product page trying to load a few high-quality GIFs demonstrating a feature. The total file size can easily tack on extra seconds to your load time. That's more than enough to frustrate a user and send them clicking away, which is bad news for your bounce rate and a direct hit to your Core Web Vitals—a critical factor for SEO.
.jpg)
The Technical Limitations of GIF
The GIF format came out in 1987. It was designed for a different internet, long before high-resolution screens and today's performance demands were even a thought. Its limitations are baked right into its DNA.
- Limited Colour Palette: GIFs are stuck with a maximum of 256 colours. This is what causes that noticeable colour banding and grainy look in more complex animations.
- Large File Sizes: The compression algorithm GIFs use (LZW) just isn't very good by today's standards. It creates bulky files that eat up bandwidth for breakfast.
- No True Transparency: GIF transparency is all or nothing. A pixel is either 100% see-through or 100% solid, which means no smooth, semi-transparent edges.
These drawbacks all add up to a pretty poor user experience. Slow-loading animations are annoying, and the low visual quality can make a professional site look amateurish. If you're looking to optimise static images too, our guide on PNG to WebP conversion has some great tips that apply there as well.
To really see the difference, a side-by-side comparison makes it obvious why WebP is the modern successor.
GIF vs Animated WebP: A Quick Comparison
| Feature | GIF | Animated WebP |
|---|---|---|
| Colour Support | 256 colours (8-bit) | 16.7 million colours (24-bit) |
| Transparency | 1-bit (on/off) | 8-bit alpha (full semi-transparency) |
| Compression | Lossless (LZW) | Lossless & Lossy (advanced algorithms) |
| Typical File Size | Large | Significantly smaller (up to 64%+) |
As you can see, animated WebP is a clear winner across the board, offering superior quality in a much smaller package.
The Performance Impact on Your Website
Using unoptimised GIFs does more than just slow down your pages; it actively hurts the performance metrics that search engines like Google use to rank your site.
According to data from various web performance analyses, unoptimised GIFs can contribute to 35% of page weight on content-heavy sites, causing 20-30% delays in Largest Contentful Paint (LCP). Google's research confirms that WebP counters this with superior compression, as lossy modes can shrink files by up to 64% while preserving 24-bit RGB colour and 8-bit alpha transparency, unlike GIF's 256-colour limit.
That delay in LCP—a core part of the Core Web Vitals—sends a clear signal to Google that your page offers a slow experience, which can tank your search rankings. Sticking with GIFs means you are deliberately making your site slower and less competitive. This is where converting from GIF to WebP stops being an option and becomes a must-do for any serious website. Improving page speed with faster images is a proven way to boost your Core Web Vitals and user experience.
Getting Hands-On with Command-Line GIF to WebP Conversion
When you need absolute control and a repeatable process, nothing beats the command line. Forget graphical interfaces; dropping into the terminal gives you direct access to powerful conversion engines. This is how you go from converting files one by one to building a fully automated image optimisation pipeline.
Google's own command-line utilities are the gold standard here, and for animated images, gif2webp is the tool for the job. It's been specifically designed to navigate the quirks of turning GIF animations into the far more efficient WebP format, offering you incredibly detailed control over the final output.
Setting Up Your Toolkit
First things first, you need to get the tools installed. The libwebp package, which bundles cwebp (for static images) and our star gif2webp (for animations), is easily installed on most systems with a package manager.
- On macOS (with Homebrew):
brew install webp - On Debian/Ubuntu:
sudo apt-get install webp - On Windows: Your best bet is to download the pre-compiled utilities straight from Google's developer portal.
Once that's done, pop open your terminal and run gif2webp -version. If it spits back a version number, you're all set. This confirms the tool is in your system's PATH and ready to go.
A basic conversion is dead simple. Just navigate to your file's directory and run a one-liner:
gif2webp my-animation.gif -o my-animation.webp
This command takes my-animation.gif as the input, and the -o (output) flag tells it to save the result as my-animation.webp. Simple, right? The catch is that this uses the default settings, which are often a compromise. To really dial things in, we need to use flags.
This is where the real power lies. By adding flags, you can fine-tune the entire conversion process, letting you strike that perfect balance between file size and visual quality—a non-negotiable for good web performance.
Advanced Control with Conversion Flags
Let's dig into some of the most useful flags you'll be reaching for when converting GIFs to WebP. These options put you in the driver's seat for managing the size-versus-quality trade-off.
-q [quality]****: This sets the compression quality for the image, on a scale of 0 (terrible) to 100 (perfect). From my experience, a value somewhere between 75 and 85 is the sweet spot for most animations.-m [method]****: This flag dictates the compression effort, from 0 (fastest, least compressed) to 6 (slowest, most compressed). It takes longer to process at higher numbers, but the file size savings are usually worth it. For production assets, I almost always use6.-lossy****: Add this flag to enable lossy compression. It can slash file sizes dramatically, though you might lose a tiny bit of visual detail. It's incredibly effective for animations with lots of colours and movement.-mixed****: A really clever option. This flag tells the tool to analyse each frame and decide whether to use lossy or lossless compression on a frame-by-frame basis. It's a fantastic way to optimise for the absolute smallest size without obvious quality hits.
Here’s what a more realistic, production-ready command looks like:
gif2webp -q 80 -m 6 -mixed my-animation.gif -o my-animation-optimised.webp
This command doesn't just convert the file; it optimises it. We're setting a high quality level (80), telling it to use the most intensive compression method (6), and enabling mixed-mode optimisation to squeeze out every last kilobyte.
Taking it to the Next Level with Scripts and Libraries
Converting one file is fine, but what about a folder with a hundred GIFs? That’s where automation becomes your best friend. A simple shell script can chew through an entire directory of GIFs in seconds.
#!/bin/bash
for file in *.gif; do
  gif2webp "$file" -o "${file%.gif}.webp"
done
This handy little script loops through every .gif file in the current folder and runs the conversion, saving you from a world of repetitive manual work.
This whole process is a natural part of modern web development. WebP was specifically evolved to outperform old LZW-compressed GIFs. With near-universal browser support today, you can confidently switch to WebP knowing your users will get a faster experience.
But you don't have to stop at shell scripts. You can bake this optimisation right into your application's build process or backend services with dedicated image processing libraries.
- For Node.js: The sharp library is a fantastic, high-speed option for all sorts of image manipulation.
- For Python: Pillow (a more user-friendly fork of PIL) is the go-to for robust image handling.
By using a library like sharp or Pillow, you can ensure that every animated asset you serve is automatically optimised during deployment. No manual steps, just consistently fast and efficient images for your users.
Quick and Easy Online Conversion Tools
Sometimes, you don't need to open a terminal or wrestle with a complex library. You just need to convert a GIF to WebP, and you need it done now. This is where browser-based online tools shine, offering a fast, no-fuss solution for marketers, content creators, or anyone who just wants a quick fix without touching any code.
You can find one of such conversions on our tools page, this will take care of you GIF file.
Think about it: a social media manager can grab an animation and optimise it for a blog post in minutes, without having to file a ticket with the development team. This kind of agility is a game-changer for content-heavy teams where speed is everything.
The beauty of these platforms lies in their simplicity. The whole process is usually just a three-step dance: upload, tweak, and download. You drag your GIF into the browser, fiddle with a setting or two, and walk away with a WebP file ready for action. It’s all about removing the technical roadblocks.
What to Look for in an Online Converter
At first glance, most online converters look the same, but the devil is in the details. A few key features separate the truly useful tools from the basic ones, and knowing what to look for can save you a lot of time and frustration.
Keep an eye out for these differentiators:
- Quality Control: The most important feature is a simple slider or input box to adjust the lossy compression. This is how you find that perfect balance between a tiny file size and a crisp, clear image.
- Batch Processing: If you have more than one GIF to convert, this is a non-negotiable. The ability to upload and convert a whole folder of animations at once is a massive time-saver compared to doing them one by one.
- Generous File Size Limits: Free tools almost always have a cap on the upload size. Before you get started, check the limits to make sure your high-resolution animations won't get rejected.
If you want to see these features in action, trying an online GIF to WebP converter is a great way to get a feel for the workflow.
A Real-World Example
Let's put this into practice. Say you've got a 5 MB product demo GIF that's making your landing page load at a snail's pace.
You’d head to an online converter and upload your product-demo.gif file. The tool will likely have a quality slider, probably set to a default around 80, which is a solid starting point. Instantly, you’ll see a preview of the WebP version and its new file size—let's say it's now just 1.2 MB. That's an incredible 76% reduction with almost no visible loss in quality. A quick click on the download button, and you have product-demo.webp, ready to go.
The true advantage of online tools is the immediate feedback. You can play with the quality settings in real-time, instantly seeing the trade-off between file size and visual fidelity until you find the sweet spot for your project.
While these tools are fantastic for one-off jobs and quick turnarounds, they have their limits. They aren't built for automating optimisation across an entire website, and they can't offer the granular control you get from command-line tools. Still, for getting the job done fast and without any technical headaches, they're an invaluable part of any modern web toolkit.
Automating Conversions with an Image API
Let's be honest, converting GIFs one by one or running command-line scripts just doesn't scale. It's fine for a one-off project, but when you're managing a dynamic website with hundreds or thousands of images, that manual approach quickly becomes a massive headache. This is where an image API like PixelFiddler completely changes the game, turning your GIF to WebP workflow from a repetitive chore into a 'set it and forget it' process.
The core concept is wonderfully simple: stop pre-processing your images. Instead of converting every single GIF before you upload it, you just upload the original file. The API handles the conversion on the fly, triggered by a tiny change to the image URL.
.jpg)
Say your original GIF lives at this URL:
https://media.pixel-fiddler.com/my-source/media/my-image.jpg
To get a perfectly optimised WebP version, all you have to do is tack on a parameter:
https://media.pixel-fiddler.com/my-source/media/my-image.jpg?format=webp
And that's it. The API intercepts the request, grabs the original GIF, converts it to an animated WebP in real-time, and sends the new, much smaller file to the user's browser. The very first request might take a fraction of a second longer, but every request after that hits a cached version delivered instantly from a global CDN.
Beyond Simple On-the-Fly Conversion
This URL-based method is powerful on its own, but its real magic appears when you start using the more advanced features. Modern image APIs aren't just simple converters; they’re intelligent delivery pipelines that can adapt to every user and device, which is a massive win for your site's performance and Core Web Vitals.
One of the most valuable features is automatic format negotiation. Instead of hardcoding ?format=webp into your URLs and then worrying about writing fallback code for older browsers, you can just let the API handle it. By enabling an "auto format" setting, the service intelligently inspects the browser's Accept header with every single request.
- If the browser supports WebP, it gets the WebP version.
- If it doesn't, it seamlessly receives the original GIF.
This completely removes the need for complex <picture> element logic in your frontend code. It simplifies development and guarantees every visitor gets the best format they can handle, with zero broken images.
Standardising Optimisation with Named Aliases
As your website or app grows, consistency is everything. You don't want one developer setting a quality level of 75 while another uses 85, creating an unpredictable mess of file sizes and visual quality across your platform. This is the exact problem that named aliases solve.
An alias is just a pre-configured set of transformations you save under a simple, memorable name. For example, you could create an alias called animated-thumbnail that bundles a few actions together:
- Converts the file to WebP (
format=webp) - Sets the quality to 80 (
q=80) - Resizes the animation to 300 pixels wide (
w=300)
Now, instead of a long, clunky URL full of parameters, your image request becomes clean and self-explanatory:
https://media.pixel-fiddler.com/my-source/media/my-image.jpg?alias=animated-thumbnail
This approach is a game-changer for teams. It ensures every single animated thumbnail on your site uses the exact same optimisation settings, creating a consistent experience. Better yet, if you ever decide to tweak the quality or size, you only have to update the alias in one place. That change will then automatically roll out across the thousands of images using it on your website.
Building a future-proof image delivery pipeline isn't just about conversion. It's about offloading complex logic to a specialised service, saving countless developer hours and dramatically cutting down on bandwidth costs.
The impact of this kind of automation on both performance and your bottom line is huge. By switching to WebP, businesses often see file size reductions of up to 64% while keeping the animation and transparency perfectly intact. This aligns with how a smart API can serve optimised WebP variants, leading to significant bandwidth cost savings of 50–90% and a measurable lift in conversions. You can dig into more data on WebP's efficiency and impact to see how these savings add up in the real world.
Ultimately, using an image API for your GIF to WebP conversions shifts your performance strategy from being reactive to proactive. You stop worrying about individual files and start building a smart, scalable system that does the heavy lifting for you.
Serving WebP Animations the Right Way
You've done the hard work and created a beautifully optimised WebP animation. Great! But the job isn't quite finished. If you just swap the .gif file for a .webp file in your <img> tag, you’ll end up with a broken image for a small but important slice of your audience using older browsers. The real trick is to serve the modern format to browsers that can handle it while having a reliable fallback for those that can't.
This is a perfect opportunity to use modern HTML to build a smarter, more resilient front end. The <picture> element is your best friend here, acting as a wrapper that lets the browser intelligently pick the best image source from a list you provide.
.jpg)
This approach guarantees that page speed improves for the vast majority of your users without leaving anyone behind. Faster images are a direct win for Core Web Vitals, and it's not just a vanity metric. A study by Google found that even a 100-millisecond improvement in Largest Contentful Paint (LCP) can boost conversions. If you're curious, you can dig into Google's research on the impact of page speed on business metrics.
Manual Implementation with the Picture Element
Putting this fallback logic in place yourself is surprisingly straightforward. The <picture> element is designed to hold multiple <source> elements, each pointing to a different image format. The browser simply goes down the list and grabs the first one it supports.
Here’s what that looks like in practice:
<picture>
  <source srcset="my-animation.webp" type="image/webp">
  <img src="my-animation.gif" alt="A descriptive alt text for the animation">
</picture>
In this snippet, a browser first checks if it understands the image/webp type. If so, it loads my-animation.webp and stops right there. If not, it just skips the <source> tag and falls back to the standard <img> tag, loading my-animation.gif. It's a clean, semantic solution that works everywhere.
This client-side approach gives you direct control, making it a rock-solid method for ensuring cross-browser compatibility. The only catch is that you have to manage and upload two separate files for every single animation.
While this works perfectly, it does add a bit of manual work. If your site has dozens of animations, keeping track of everything can get tedious pretty quickly. That's where a more automated approach really starts to shine.
Automated Serving with Content Negotiation
For a more scalable solution, you can offload the decision-making to an intelligent service like PixelFiddler. Instead of writing fallback logic in your HTML, you use a technique called content negotiation, which all happens on the server side.
Here’s the basic idea:
- When a browser requests an image, it sends along an
Acceptheader. This header is just a list of all the file types it can handle (e.g.,image/webp,image/avif,image/jpeg). - An image API, like PixelFiddler, peeks at this header.
- It then automatically serves the best possible format that the browser supports, all without you changing a single line of your front-end code.
Your image tag can go back to being a simple, clean <img> element pointing to the original GIF through a PixelFiddler delivery URL:
<img src="https://media.pixel-fiddler.com/my-source/media/my-image.jpg?auto=format" alt="My cool animation">
By adding a parameter like auto=format, PixelFiddler takes care of the whole negotiation process. A modern Chrome browser gets a WebP file, while an older browser gets the original GIF. This tidies up your codebase, cuts down on maintenance, and ensures every user gets an optimised experience automatically. You can also explore our other tools that help you compress WebP files for even better performance.
Common Questions About GIF to WebP Conversion
Even with the benefits laid out and the methods explained, you probably still have a few nagging questions about making the switch from GIF to WebP. That's a good thing. It pays to look at this from all angles before you change up your workflow. Let's tackle the most common concerns I hear, so you can move forward with confidence.
Does Converting a GIF to WebP Reduce Its Quality?
This is the big one, but the answer is reassuring: not necessarily. The real beauty of WebP is its flexibility, as it supports both lossless and lossy compression. If you opt for a lossless conversion, the visual quality will be identical to your original GIF, frame for frame, but with a much smaller file size. It's a straight-up win.
For even more aggressive optimisation, you can use lossy compression. This approach cleverly removes redundant data, which might cause a tiny—and often totally imperceptible—change in quality. The trick is to find the right balance for your specific animation. A quality setting between 75-85 is usually the sweet spot, but my best advice is to experiment and see what looks good to your eye.
A common pitfall I see is people assuming one quality setting fits all animations. An animation with simple, flat colours can often be compressed much more aggressively than one with complex gradients and textures, without anyone noticing the difference.
Do All Browsers Support Animated WebP?
These days, browser support for animated WebP is fantastic. Over 97% of global internet users are on browsers that handle it perfectly, including all modern versions of Chrome, Firefox, Safari, and Edge. The era of WebP being a niche format is well and truly over.
That said, you can't just ignore that small percentage of users on older, legacy browsers. You don't want them seeing a broken image. This is where the HTML <picture> element is your best friend, as it lets you provide the original GIF as a fallback. Alternatively, a service that handles automatic content negotiation can manage this for you, making sure every single visitor sees your animation without any extra effort on your part.
Can I Convert a Batch of GIFs to WebP at Once?
Absolutely, and honestly, this is the only practical way to do it. Manually converting files one by one just isn't realistic for any real-world project.
There are a few solid ways to handle batch conversions:
- Command-Line Scripts: If you're comfortable in the terminal, a simple shell script using a tool like
gif2webpcan churn through an entire directory of GIFs in seconds. It’s perfect for integrating into a local development workflow. - Online Converters: Many browser-based tools offer batch upload features. You can just drag and drop a whole folder of files for a quick, no-code solution.
- Image APIs: For true scalability, an on-the-fly service is the way to go. By just adding a conversion parameter to your image URL, you can dynamically handle thousands of assets without ever running a manual batch job again.
What Is the Best Quality Setting for WebP Animation?
I wish there was a magic number, but there isn't a single "best" setting. The optimal quality level depends entirely on the content of the animation. A simple, two-colour loading spinner might look perfect at a quality of 60, while a detailed product demo might need to be closer to 90 to avoid looking blocky.
A good starting point is usually a quality level between 75 and 85. This range typically delivers a massive reduction in file size without a noticeable drop in visual fidelity. The best practice is always to test visually. Automated services often sidestep this guesswork by using smart algorithms to figure out the most effective quality setting for each specific image, optimising for performance without you having to lift a finger. This is why faster images are so important; they directly improve page speed and Core Web Vitals. For a deeper look, Google's research on the connection between speed and business metrics is a great read.

Ready to stop wrestling with slow GIFs and start delivering lightning-fast animations? With PixelFiddler, you can automate your entire image optimisation pipeline. Connect your storage, update your URLs, and let our API handle the rest—serving perfectly optimised WebP files to every user, every time.