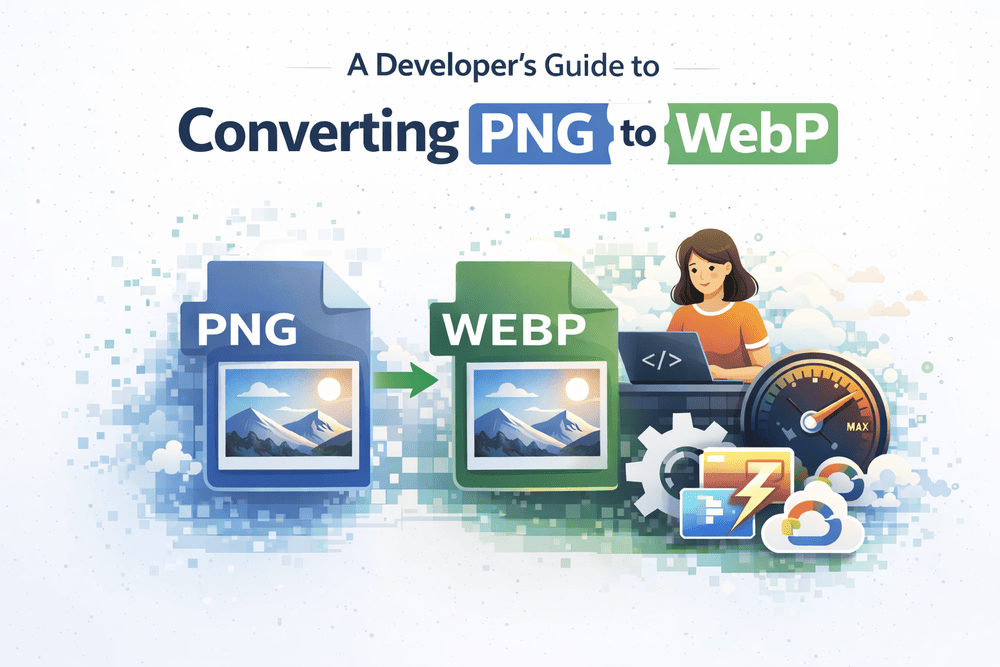
A Developer's Guide to Converting PNG to WebP
So, you want to convert a PNG to a WebP? At its core, this means you need a tool to re-encode the image data. The goal is to get it into the newer WebP format, making sure you keep that all-important transparency while drastically cutting down the file size.
So, you want to convert a PNG to a WebP? At its core, this means you need a tool to re-encode the image data. The goal is to get it into the newer WebP format, making sure you keep that all-important transparency while drastically cutting down the file size.
You can tackle this in a few ways, from command-line utilities like cwebp to programming libraries such as sharp for Node.js, or even simple online converters. The trick is picking a method that handles lossless compression well, so you don't lose a single pixel of quality.
Why Converting PNG to WebP Is a Game Changer for Web Performance
Let's be honest, large PNG files are often the prime suspect behind a slow-loading website. They’re fantastic for images that need a transparent background, but their hefty file sizes can really drag down performance, frustrate users, and even hurt your search engine rankings. This is exactly why switching from PNG to WebP isn't just a minor optimisation—it's a critical performance strategy for improving your page speed and Core Web Vitals.
WebP, a format developed by Google specifically for the web, offers far superior compression that PNG just can't compete with. According to Google's own data, when you're dealing with lossless images (where the quality is identical to the original), WebP files are typically 26% smaller than the same PNG. That reduction in page weight translates directly to faster load times and a much smoother experience for your visitors.
The Direct Impact on Core Web Vitals
A speedy website is more than just a nice-to-have; it's a cornerstone of good SEO and user experience. Google's Core Web Vitals are the metrics used to measure this, and your images have a massive impact on them.
- Largest Contentful Paint (LCP): This metric tracks how quickly the biggest visual element on the page—usually a hero image—loads. A clunky PNG can seriously delay this, resulting in a poor LCP score.
- Improved User Engagement: It's a simple equation: faster pages mean lower bounce rates. When people don't have to sit around waiting for images to appear, they're far more likely to stick around, engage with your content, and maybe even make a purchase.
By making the move to WebP, you give your LCP score a direct boost. This sends a strong signal to search engines that your site offers a quality experience, which can certainly help with your rankings. If you want to get into the weeds on image formats, we've got a detailed comparison of PNG vs JPG you might find useful.
PNG vs WebP At a Glance
To make it even clearer, here's a quick side-by-side look at how PNG and WebP stack up against each other.
| Feature | PNG | WebP |
|---|---|---|
| Compression | Lossless (DEFLATE algorithm) | Lossless and Lossy |
| Transparency | Yes (Alpha channel) | Yes (Alpha channel) |
| File Size (Lossless) | Larger | Typically 26% smaller (Source) |
| Animation | No (APNG is a variant) | Yes, natively supported |
| Browser Support | Universal | ~97% of global users |
| Primary Use Case | Graphics with transparency, logos | All-purpose web images, performance |
As you can see, WebP offers far more flexibility and a clear advantage when it comes to performance, making it the modern standard for web imagery.
The bottom line is simple: smaller image files lead to faster page loads. Converting your PNG assets to WebP is one of the most effective ways to slash load times and improve your Core Web Vitals score without sacrificing the visual quality your users expect.
Getting Hands-On with Command-Line Conversion
For developers who live in the terminal, the command line is where the real magic happens. It gives you raw power and precise control over the PNG to WebP conversion process, letting you script and automate tasks in a way that GUI tools just can't match. This is less about clicking buttons and more about crafting the perfect, repeatable command for your workflow.
Once you nail down a command for one image, you can unleash it on thousands. That's the beauty of it—efficiency and consistency, especially when you're managing a massive library of assets.
Using Google's cwebp Utility
Your first port of call should be Google's own cwebp command-line tool. It’s part of the official libwebp library, so you're getting the conversion logic straight from the source. It gives you direct access to every knob and dial of the WebP encoder. Getting it installed is usually a one-liner with a package manager like Homebrew on macOS or apt-get on Linux.
The basic syntax is refreshingly simple:
cwebp [options] input_file.png -o output_file.webp
The real power, though, is in the options. The -q flag, for instance, sets the quality for lossy compression on a scale from 0 (terrible) to 100 (perfect). From my experience, a value around 80 is the sweet spot; you get a huge drop in file size with almost no noticeable difference in quality.
This command shows a typical lossy conversion. The key takeaway is how a few simple flags let you dial in the exact output you need, right from your terminal.
Preserving Every Pixel with Lossless Conversion
But what about images where every detail matters—like a logo with sharp lines, crisp text, or intricate UI elements? For those, you'll want to go lossless. A lossless WebP preserves the image data perfectly, just like the original PNG, but often in a significantly smaller file.
With cwebp, all it takes is adding the -lossless flag.
cwebp -lossless your-logo.png -o your-logo-lossless.webp
This command guarantees a pixel-perfect copy of the source PNG. It's the go-to method for any graphic where visual fidelity is absolute, helping you boost page speed without compromising an inch on design quality.
Handling Transparency and Compression Effort
One of the biggest reasons we all use PNGs is for their transparency support (the alpha channel). The good news is that WebP handles this flawlessly, whether you’re going lossy or lossless. The cwebp tool is smart enough to detect and preserve the alpha channel automatically, so you don't need any extra flags to keep your transparent backgrounds intact.
Another flag I find incredibly useful is -m, which controls the compression effort. It ranges from 0 (fastest) to 6 (slowest), letting you trade encoding time for file size. Setting it to -m 6 tells the encoder to work harder and find more clever ways to shrink the image. It takes a bit longer, but for a production build where every kilobyte counts, it’s absolutely worth the wait.
A battle-tested command I often use for production assets with transparency looks like this:
cwebp -q 85 -m 6 -alpha_q 100 transparent-image.png -o optimized-image.webp. This strikes a great balance: high image quality (-q 85), maximum compression effort (-m 6), and perfectly preserved transparency (-alpha_q 100).
Batch Processing with ImageMagick and FFmpeg
While cwebp is fantastic for one-off conversions, sometimes you need to bring out the heavy machinery. Tools like ImageMagick and FFmpeg are the Swiss Army knives of media manipulation, and they're brilliant for bulk operations.
Batch Conversion with ImageMagick
ImageMagick is a powerhouse for command-line image editing. To convert a whole folder of PNGs to WebP, you can use its magick command inside a simple shell loop.
for file in *.png; do magick "$file" "${file%.png}.webp"; done
This slick one-liner will chew through every PNG in your current directory, converting each one to WebP and keeping the original filename. It’s a huge timesaver.
Leveraging FFmpeg in Your Workflow
You might know FFmpeg primarily as a tool for media streams, but it's surprisingly adept at handling images too. If it's already part of your media pipeline, you don't even need to install anything new.
The command is pretty straightforward:
ffmpeg -i input.png -c:v libwebp -lossless 1 -q:v 75 output.webp
Here, you're just telling FFmpeg to use the libwebp codec, set the quality, and you're done. By baking these commands into your build scripts, you can put your entire image optimisation process on autopilot.
Of course, if the command line isn't your cup of tea, there are simpler ways. We even built our own free PNG to WebP converter for a quick, no-fuss solution.
Automating Your PNG to WebP Workflow in Code
While command-line tools are great for one-off tasks and give you surgical control, they still need you to be there, typing away. The real magic happens when you move beyond manual conversions and weave this process directly into your code. When you're dealing with hundreds or even thousands of images, doing things by hand just isn't an option.
Automating the workflow means every new image gets optimised the right way from the moment it enters your project. You get consistency, you save countless developer hours, and your website always serves up the fastest images possible. It transforms image optimisation from a repetitive chore into a "set it and forget it" part of your development cycle.
PNG to WebP Conversion with Sharp in Node.js
If you're working in the Node.js world, there's really only one name you need to know for image processing: Sharp. It's blazing fast, has zero dependencies, and provides a clean, modern API for all sorts of image manipulations, including format conversions.
Getting Sharp into your project is a piece of cake. Once it's installed, you can knock together a quick script to watch a directory and automatically convert any new PNGs that land there. This is a perfect setup for a CMS where editors are uploading new assets all the time.
Here's a practical script that takes a PNG and converts it to a high-quality, lossless WebP:
const sharp = require('sharp');
async function convertPngToWebp(inputFile, outputFile) { try { await sharp(inputFile) .webp({ lossless: true }) // We're telling it to do a lossless conversion .toFile(outputFile); console.log(Successfully converted ${inputFile} to ${outputFile}); } catch (error) { console.error('Error during conversion:', error); } }
// And here's how you'd use it convertPngToWebp('path/to/source.png', 'path/to/destination.webp');
This little snippet is genuinely production-ready. By setting lossless: true, you're guaranteeing a pixel-perfect conversion that keeps the original image's quality intact while still getting WebP's superior compression. For a deeper dive into how these ideas work within a modern framework, our guide on Next.js image optimisation shows you how to put it all together.
Pro Tip for Automation: Pair
sharpwith a file-watching library likechokidar. You can set up a background process that instantly converts any PNG dropped into anuploadsfolder. Your image pipeline becomes completely hands-free.
The results of this kind of automation are massive. Analysis from Poland's National Institute of Telecommunications (NASK) showed that publishers systematically switching from PNG to WebP saved a huge 35% on bandwidth. This makes sense when you consider that WebP handles lossless compression 26% better than PNG, according to Google's own tests. You can dig into the data in the Web Performance Report to see the full impact of such optimisations.
Using Pillow for Python-Based Conversions
Over in the Python ecosystem, the go-to library for this kind of work is Pillow. It's a user-friendly fork of the classic Python Imaging Library (PIL) and comes with fantastic support for different file formats and a simple API for opening, tweaking, and saving images.
Just like with Sharp, you can use Pillow to build powerful, automated conversion scripts. It’s particularly handy in backend applications built with Django or Flask, where you might be handling user-uploaded images that need to be optimised on the fly.
Here’s how you’d convert a PNG to WebP with Pillow while making sure to preserve any transparency:
from PIL import Image
`def convert_image_to_webp(input_path, output_path): try: with Image.open(input_path) as img:
The 'save' method is smart enough to handle the conversion
img.save(output_path, 'webp', lossless=True) print(f"Successfully converted {input_path} to {output_path}") except IOError as e: print(f"Error converting file: {e}")`
Here's an example of how to call it
convert_image_to_webp('assets/logo.png', 'dist/logo.webp')
That simple function is all it takes. Pillow is smart enough to handle the alpha channel (transparency) from the source PNG, and the lossless=True argument ensures you don't lose a single pixel of quality. It's easy to wrap this function in a loop to process an entire directory of images at once.
Integrating Conversion into Your Build Process
Beyond writing standalone scripts, the most powerful place to automate image conversion is right inside your site's build process. Modern front-end tools like Webpack, Vite, or Astro are designed to handle this stuff for you.
- Webpack: Use the
image-minimizer-webpack-pluginalong withsharpto automatically convert and shrink images as part of your production build. - Vite: Plugins like
vite-plugin-image-optimizerdo a similar job, processing your images as your project gets bundled up. - Astro: The framework's built-in
<Image />component is a dream. It can automatically convert images to next-gen formats like WebP, generate different sizes, and write the correctsrcsetattributes for you.
By plugging convert png to webp tasks into these build tools, you ensure every image your users see is as small and efficient as possible. This directly boosts your site's performance and Core Web Vitals scores—all without adding a single manual step to your day-to-day workflow.
A More Intelligent Approach: The PixelFiddler Tool
While generic converters get the job done, a purpose-built tool gives you much more control and insight. We built our free PNG to WebP converter to bridge the gap between a simple, one-time task and a professional, automated workflow. It’s designed to be fast, intuitive, and genuinely useful.
You just drag your PNG file into the browser, and the magic happens instantly.
- See the Quality Trade-offs: An interactive slider lets you adjust the quality from 1 to 100. You can immediately see how dialing it down affects the image, helping you find that sweet spot between file size and visual fidelity.
- Live Side-by-Side Preview: No more downloading and checking. The tool shows your original PNG right next to the converted WebP, so you can compare them in real time and make an informed choice.
- Instant Savings Feedback: The best part? You see exactly how many kilobytes you’re saving as you adjust the settings. This immediate feedback really drives home just how powerful WebP compression is.
It’s the ideal tool for designers, marketers, or developers who need to quickly optimise an image before dropping it into a CMS or sending it off to a client.
The real power of a great online tool isn’t just converting a single file. It’s about showing you what’s possible with the underlying technology, giving you a taste of what you could achieve with full automation.
Moving from Manual Clicks to Full Automation
Our online converter is more than just a handy utility—it's a window into the PixelFiddler API. Every time you move that quality slider, you're actually generating a URL-based transformation behind the scenes. This is where you can leave the manual work behind for good.
For example, after uploading your image, the tool might create a URL that looks like this:
https://media.pixelfiddler.com/source/media/your-image.png?format=webp&quality=80
That one URL does everything the manual tool does, but programmatically. By simply changing the parameters—like quality=75 or quality=90—you can generate any variation you need without ever opening an interface.
This API-first approach means you never have to manually convert PNG to WebP again. You keep your original high-quality PNG as the source of truth, and PixelFiddler handles the real-time conversion and optimisation, delivering the perfect format to every user, every time.
Why This Matters for Your Core Web Vitals
Switching from manual uploads to an automated, API-driven workflow has a massive impact on your site's performance and, by extension, your Core Web Vitals. Serving smaller, next-gen images is one of the single most effective ways to improve your Largest Contentful Paint (LCP) score.
Faster-loading images mean the most important content on your page appears sooner, which is a major ranking factor for search engines. Google recommends an LCP of 2.5 seconds or less for a good user experience, and lightweight WebP images are a direct path to hitting that mark.
It doesn’t stop there. By delivering images perfectly sized for the user's screen, you also improve the Cumulative Layout Shift (CLS), another vital metric. When the browser knows an image's dimensions in advance, it can reserve the correct space, preventing that annoying content jump as the page loads. Using an API ensures every image helps build a stable, fast, and user-friendly experience, solidifying your site's technical SEO.
Building a Future-Proof Image Delivery Pipeline
Look, running one-off scripts or manually converting images works for a few files, but it simply doesn't scale. If you're serious about performance, you need to stop thinking about individual files and start building an automated delivery pipeline. This is where image optimisation stops being a chore and becomes a built-in, invisible part of how you serve content.
A smart image pipeline essentially creates a separation between your master images and what your users actually see. You keep one high-quality original, and a dedicated service handles all the heavy lifting in real time—delivering the perfect format and size for every single request.
Connecting Your Existing Storage
The best part about a modern pipeline is that it slots right into your existing setup. There's no need for a massive, painful migration or re-uploading thousands of assets. Services like PixelFiddler are designed to connect directly to your cloud storage, whether it’s in Amazon S3, Google Cloud Storage (GCS), or another major provider.
With this approach, you maintain a single source of truth: your original PNGs. The pipeline sits between your storage and your users, intercepting requests and applying transformations on the fly. This completely removes the need to clutter your storage buckets with dozens of versions of the same image (image.webp, image-small.webp, image-large.webp, and so on).
Your workflow stays dead simple. Upload a new PNG, and the pipeline handles the rest. It also makes it trivial to adopt other formats. In fact, the same principles apply if you ever need to convert AVIF to PNG for niche use cases.
The Power of On-the-Fly Transformations
Once your storage is connected, the API becomes your creative playground. Instead of pre-processing everything, you just tweak the image URL to tell the service what to do. It’s a simple change that unlocks powerful, automated optimisation without touching a line of backend code.
Let’s take a real-world e-commerce scenario. Say you have a product photo stored as a high-quality PNG:
https://your-storage.com/images/product-photo.png
Using a service like PixelFiddler, you just point the URL to its delivery domain and add a few parameters:
https://med.pixelfiddler.com/images/product-photo.png?w=800&format=auto&q=80
Here’s what that URL tells the pipeline to do instantly:
w=800: Resize the image to a maximum width of 800 pixels.format=auto: Automatically detect the user’s browser. If it supports WebP, serve a WebP. If not, gracefully fall back to the original PNG.q=80: Apply a quality setting of 80, hitting that sweet spot between file size and visual fidelity.
That single URL dynamically handles the entire PNG to WebP conversion for compatible browsers, giving users a much faster experience without you needing any complex build steps.
Many large e-commerce platforms report conversion improvements and faster load times when moving to next-gen formats like WebP — sometimes cutting load times by over a second, which can correlate with higher engagement and conversions.
Slashing Costs and Improving Core Web Vitals
When you implement an automated pipeline, you deliver a much better user experience—something search engines actively reward. Serving smaller image files from a global content delivery network (CDN) directly improves your Largest Contentful Paint (LCP) score, which is a critical factor in how Google views your site's performance.
Beyond that, the automation leads to some serious cost savings. Instead of pushing a large, unoptimised PNG to every visitor, you’re sending a tiny, highly compressed WebP file. For image-heavy websites, this can easily reduce data transfer by 50% or more, leading to a substantial drop in your cloud bill. Building a future-proof pipeline is an investment that pays for itself through better performance, higher engagement, and lower operational costs.
Common Questions About PNG to WebP Conversion
Whenever you're thinking about moving from a comfortable, well-known format like PNG to something newer, a few questions are bound to pop up. It's completely normal. Getting a handle on the details of WebP will help you make the switch with confidence, so you can lock in those performance gains without any nasty surprises.
Let's walk through some of the things people ask most often.
Will I Lose Image Quality When Converting from PNG to WebP?
This is the big one, and rightly so. The answer really comes down to how you convert the image. One of the best things about WebP is its flexibility; it gives you two very different ways to handle compression.
- Lossless WebP: Think of this as the direct equivalent to your PNG. When you opt for a lossless conversion, the WebP file is a perfect, pixel-for-pixel copy of the original. You get zero quality loss, but you still benefit from WebP’s smarter compression, which almost always results in a smaller file.
- Lossy WebP: This is where you can see some really dramatic file size savings. In this mode, some of the less critical image data is carefully discarded. The great part is you get to decide how much. You can typically set a quality level from 1 to 100. From my experience, for most images with transparency, a quality setting around 80-85 hits the sweet spot—the file size plummets, but the visual difference is virtually impossible to spot.
How Do I Handle Browsers That Don't Support WebP?
It's true, while WebP support is now fantastic—covering over 97% of users worldwide—you still need a plan for that last little bit. Ignoring those users can lead to a broken experience.
The standard, most reliable way to handle this is with the HTML <picture> element. It’s designed for exactly this scenario, letting you provide the browser with a few image options.
The browser simply works its way down the list and grabs the first format it understands.
Is WebP Always Smaller Than PNG?
In nearly every real-world situation, yes. When it comes to graphics with transparency, a lossless WebP is consistently smaller than the same PNG, often by 20-30% or even more. The compression technology is just a generation ahead.
The only time you might see a PNG come out smaller is with a tiny, heavily optimised image that uses a very limited colour palette. But for the vast majority of assets you'll find online—logos, UI elements, photos with transparent backgrounds—WebP is going to give you a much better compression ratio. That efficiency translates directly into faster load times and better Core Web Vitals, which is a huge deal for modern SEO and user experience.
Can I Convert Animated PNGs to WebP?
You absolutely can, and you should! Animated WebP is a fantastic replacement for both Animated PNG (APNG) and the ancient GIF format.
Tools like FFmpeg make it straightforward to convert APNG sequences into a single, highly efficient animated WebP file. The file size savings here are often even more impressive than with static images. This makes animated WebP the perfect choice for adding rich, high-quality animations to a site without the performance hit you’d get from older formats.

Ready to automate your image pipeline and stop worrying about manual conversions? With PixelFiddler, you can connect your existing storage and deliver perfectly optimised WebP images on the fly with simple URL transformations. Try our free PNG to WebP conversion tool to see the power of the API for yourself.