A Developer Guide to Perfect OG Image Size
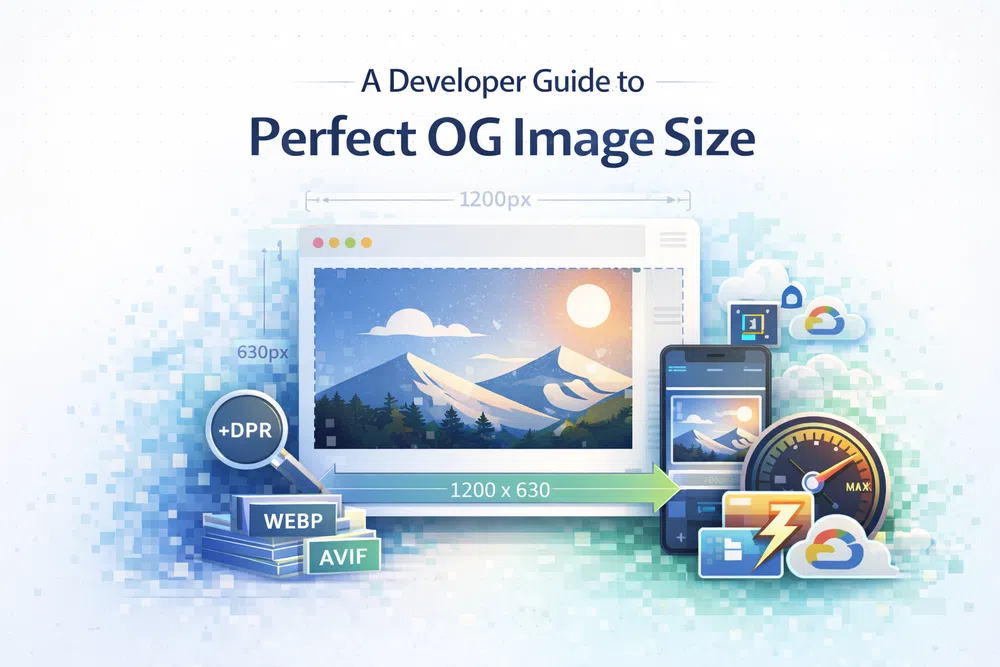
If you're looking for the one-size-fits-all answer for your OG image, here it is: 1200 x 630 pixels. This is the universally accepted standard, giving you a perfect 1.91:1 aspect ratio. Think of this as the gold standard. Nailing these dimensions is the key to getting a sharp, professional-looking preview pretty much everywhere your content gets shared. It's the simplest way to avoid weird cropping and make sure your link grabs attention for all the right reasons.
If you're looking for the one-size-fits-all answer for your OG image, here it is: 1200 x 630 pixels. This is the universally accepted standard, giving you a perfect 1.91:1 aspect ratio.
Think of this as the gold standard. Nailing these dimensions is the key to getting a sharp, professional-looking preview pretty much everywhere your content gets shared. It's the simplest way to avoid weird cropping and make sure your link grabs attention for all the right reasons.
Why 1200x630 Pixels is the Gold Standard
Whenever someone shares a link from your site, social platforms send out a crawler to scan your page's HTML for Open Graph (OG) meta tags. The og:image tag, specifically, points the crawler to the image you want displayed as a preview. This image is your content's first impression—it's the visual handshake that convinces someone to click.
The 1200x630 dimension isn't just some arbitrary number. It was championed by Facebook, the very creator of the Open Graph protocol, because it hits the sweet spot for high-resolution displays. It’s large enough to look fantastic on a big desktop monitor but still renders cleanly on a small phone screen without being a massive file.
For a quick reference, here's a summary of the key specs to aim for.
Recommended OG Image Dimensions at a Glance
| Attribute | Recommendation |
|---|---|
| Dimensions | 1200 x 630 pixels |
| Aspect Ratio | 1.91:1 |
| Minimum Size | 600 x 315 pixels |
| File Size Limit | Under 5 MB is best |
Sticking to these guidelines gives you the best shot at a great-looking preview every time.
The Consequences of Incorrect Sizing
Getting the OG image size wrong leads to problems you can see immediately. If your image is too small—say, under 200x200 pixels—most platforms will just flat-out ignore it. Your link will show up without any visual at all. If the aspect ratio is off, you're at the mercy of automatic cropping, and the results are rarely pretty.
Here’s a quick rundown of what can go wrong:
- Awkward Cropping: Important parts of your image or text can get chopped off, leaving a confusing or sloppy-looking preview.
- Poor Quality: An image that’s too small gets stretched to fill the space, ending up a pixelated, blurry mess that reflects poorly on your brand.
- Complete Omission: Some crawlers won't even try to display an image that doesn't meet their minimum size requirements, making your shared link practically invisible in a busy feed.
By standardising on the 1200x630 pixel OG image size, you establish a reliable foundation. It ensures your content is presented clearly and attractively, encouraging more clicks and engagement when shared on platforms like Facebook, LinkedIn, and X.
This approach does more than just make your brand look good; it creates a better user experience. And as a bonus, a well-optimised OG image plays a part in your site's overall performance. This is a simple but powerful first step in mastering your social sharing game.
Why OG Images Matter for Clicks and Code
So, why fuss over a single preview image? Because that little og:image tag punches well above its weight, influencing two massive factors in your site's success: how many people click your links and how well your site performs technically. It's where sharp marketing meets smart engineering.
Think about scrolling through a busy social media feed. Your Open Graph image is your first, and often only, chance to grab someone's attention. It’s what makes someone stop scrolling and actually click. A sharp, relevant, and eye-catching OG image can seriously boost your click-through rate (CTR), which means more traffic and more eyes on your brand.
It's basically the book cover on a crowded shelf. A bland, poorly cropped cover gets lost in the noise, but a great one makes you want to pick it up and see what's inside. That first impression is everything.
The Hidden Performance Drag of a Heavy Image
But this isn't just about looking good. The technical details of your OG image, especially its file size, have a direct impact on performance metrics, including Google's Core Web Vitals. Now, the image itself doesn't show up on your webpage for visitors to see, but social media crawlers and other services still have to download it to generate that link preview.
If you use a huge, unoptimised image file, you're forcing those crawlers to waste time and bandwidth. This can make the preview load slowly, and in a worst-case scenario, the crawler might just give up, leaving you with no image preview at all.
A heavy OG image is a hidden performance bottleneck. You don't see it on your page, but its slow download time can bog down link preview generation and make your site seem slow to the services that matter.
This isn't just a theoretical problem. A slow-loading preview is frustrating and can create a negative impression of your brand before a user even lands on your site. Nailing your OG image size is a simple way to make sure that the entire journey, right from the first click, feels fast and smooth.
Connecting the Dots to Core Web Vitals
While your og:image won't directly impact your page's Largest Contentful Paint (LCP) for a human visitor, optimising it is part of a bigger "performance-first" mindset that search engines absolutely love. If you get into the habit of serving lean, efficient images everywhere, your overall page speed will improve. You can dive deeper into this in our guide on improving page speed thanks to faster images.
This discipline is especially critical in mobile-first markets. For example, according to DataReportal, Facebook had over 17 million users in Poland at the start of 2023. A poorly sized og:image can hurt your reach and contribute to slower load times on the most popular platform. With mobile resolutions like 414x896 and 390x844 now common, delivering optimised images is non-negotiable for good Core Web Vitals scores and avoiding blurry thumbnails that tank conversions. You can discover more about Poland's digital trends to see why this matters.
To make sure your images are helping, not hurting, focus on these three things:
- File Size: Keep your OG image well under platform limits. Aim for under 1 MB to be safe. This ensures crawlers can grab it in a flash.
- Format Choice: Use modern formats like WebP whenever you can. They offer much better compression than old-school JPEGs or PNGs.
- Compression: Use smart compression tools to shrink the file size without making the image look pixelated or blurry.
In the end, treating your OG image with the same care you give your on-page assets builds a faster, more reliable experience for everyone. It's proof that getting the og image size and format right is where great marketing and solid development come together.
Getting the Dimensions Right for Major Social Platforms
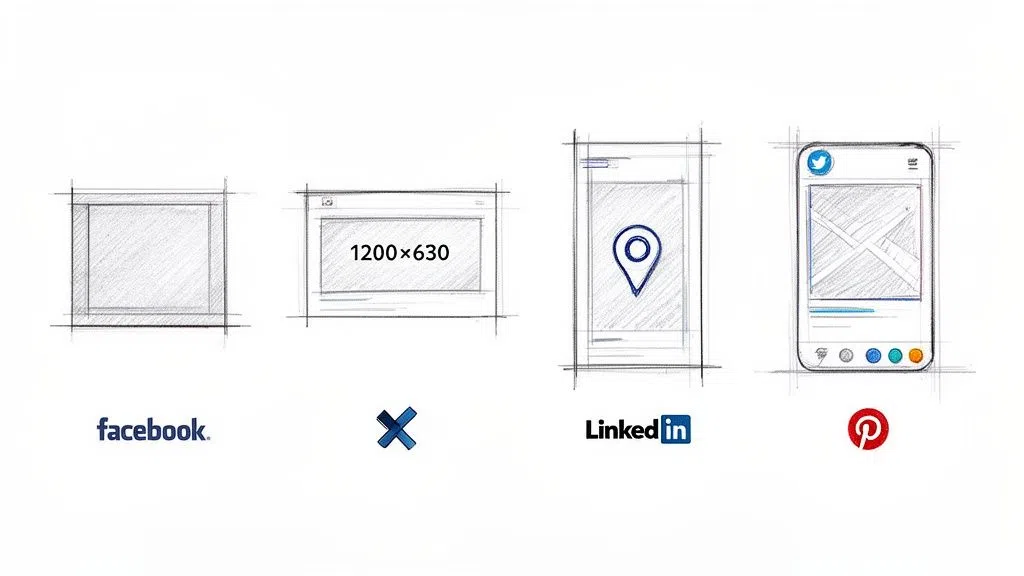
While 1200x630 pixels is your go-to, reliable standard, each social media platform has its own little quirks. Think of your main OG image as a perfectly tailored suit—it looks great almost anywhere. But sometimes, a specific event calls for a different outfit. This is your guide to dressing up your og:image for each major network.
Getting these nuances right is crucial. An image that looks stunning on Facebook might get awkwardly cropped on X (formerly Twitter) or feel completely out of place on Pinterest. By tweaking your approach for each platform, you guarantee your content makes a killer first impression, no matter where it’s shared.
Facebook: The Original Standard-Bearer
As the creator of the Open Graph protocol, Facebook still sets the pace. It heavily favours the 1200x630 pixel image, which perfectly fits its preferred 1.91:1 aspect ratio. Stick to this, and your image will show up in that big, eye-catching format we all want to see in the feed.
If you go smaller, Facebook will do its best, but anything under 600x315 pixels gets demoted to a tiny square thumbnail. It's a surefire way to get your content lost in a sea of updates.
X (Twitter): All About Cards and Cropping
X has its own system called "Twitter Cards," but thankfully, it falls back to your OG tags if specific Twitter tags aren't there. For their standard "Summary Card with Large Image," X also leans towards a 1.91:1 aspect ratio.
The catch? X can be a bit aggressive with its cropping. While 1200x630 pixels usually works just fine, some developers swear by a slightly different 1200x628 pixels (2:1 ratio) for absolute peace of mind. The real pro tip is to keep your crucial elements—like text or logos—away from the edges so they don't get sliced off.
LinkedIn: Keeping It Professional
LinkedIn also plays by the rules and prefers the 1200x630 pixel standard. This dimension allows it to create that clean, professional preview that stretches across the full width of the feed.
Upload something smaller, and your link preview gets relegated to a small box next to the text, which just doesn't have the same impact. On a network where appearances matter, a polished, correctly sized OG image is a must. It signals professionalism and attention to detail.
Your goal is to fill the maximum visual real estate on each platform. Using the recommended OG image size prevents your link from being demoted to a less engaging, smaller format, which can drastically lower click-through rates.
Pinterest: The Vertical Outlier
And then there's Pinterest. It's the odd one out. While it will show a standard landscape image, the entire platform is built around a vertical experience. Users scroll through tall, portrait-style Pins, so your horizontal OG image will look tiny and lost.
To really stand out on Pinterest, you need a 2:3 aspect ratio—think 1000x1500 pixels. This ensures your image fills the screen and grabs attention. If Pinterest is a major traffic driver for you, it's absolutely worth creating a separate, vertical og:image just for it.
Platform-Specific OG Image Size Cheat Sheet
To make things easier, here’s a quick-reference table summarising the ideal specs for each platform. Think of this as your cheat sheet for getting it right every time.
| Platform | Recommended Dimensions | Aspect Ratio | Max File Size |
|---|---|---|---|
| 1200 x 630 pixels | 1.91:1 | 8 MB | |
| X (Twitter) | 1200 x 628 pixels | 1.91:1 or 2:1 | 5 MB |
| 1200 x 630 pixels | 1.91:1 | 5 MB | |
| 1000 x 1500 pixels | 2:3 | 20 MB |
Bookmark this table. It's a simple way to double-check your work and ensure your images are optimised to perform their best, no matter where they end up.
Giving Crawlers a Heads-Up with Width and Height
So, how do you tell these platforms the exact size of your image? The Open Graph protocol gives us two handy little meta tags for just that: og:image:width and og:image:height.
By including these, you're explicitly telling the platform’s crawler the dimensions of your image before it even has to download it. This helps it render the preview correctly and quickly, which can speed up the whole sharing process.
Here’s what that looks like in your code:
<meta property="og:image" content="https://media.pixel-fiddler.com/my-source/media/my-image.jpg" />
<meta property="og:image:width" content="1200" />
<meta property="og:image:height" content="630" />
Adding these two lines is a small effort that pays off big. It removes any guesswork for the crawlers and makes sure your OG image size is respected, giving you consistent, predictable results every single time.
Picking a Format That Won't Slow You Down
Nailing the 1200x630 pixel dimension is a great start, but it's only half the story. An og image that's perfectly sized but weighs 10 MB is a performance killer. The file format you choose is just as important as the dimensions, directly affecting how quickly your link preview loads and how users perceive your site's speed.
Choosing a format is always a balancing act between image quality and file size. We’ve relied on trusty formats like JPEG and PNG for years, but modern alternatives give us a serious edge. Every kilobyte saved means faster load times, which is a win for both user experience and your site's overall health.
The Classic Showdown: JPEG vs. PNG
These two have been the workhorses of the web for a long time, and each has its place. Knowing when to use which will help you make smarter choices for your OG images.
- JPEG (JPG): This is your go-to for photos and any complex images with lots of colours and smooth gradients. Its lossy compression is brilliant at shrinking file sizes for photographic content without a noticeable hit to quality.
- PNG: Best for graphics that need crisp lines, sharp text, or a transparent background—think logos or diagrams. PNG uses lossless compression, meaning it keeps every single pixel perfect, but this usually results in a larger file.
If you want to dive deeper, we've got a whole article exploring the differences between PNG and JPG. For most OG images, which often mix photos with text, a well-optimised JPEG usually hits the sweet spot.
The Modern Contenders: WebP and AVIF
This is where the real performance gains are. Next-generation formats like WebP and AVIF offer far superior compression, letting you create images that are dramatically smaller than their older counterparts while looking just as good, if not better.
WebP can shrink images to be about 25-34% smaller than a comparable JPEG. AVIF, the newcomer, is even more impressive, often cutting file sizes by 50% or more compared to JPEG, a figure backed by experiments from companies like Netflix.
The good news is that nearly all modern browsers now support WebP and AVIF, making them fantastic choices if you're serious about performance. Using them for your OG image can slash its file weight.
Practical Tips for a Lean OG Image
Staying under the 5-8 MB file size limits set by social platforms is easy if you know what you're doing. The goal should always be to get your image as light as possible without making it look blurry or cheap.
Here are three simple steps to keep your image files trim:
- Compress Smartly: Use tools that can intelligently reduce file size. Cranking the compression way up might save a few extra kilobytes, but you risk getting nasty visual artefacts. Find that happy medium where the quality is still sharp enough for a social feed.
- Strip Out Metadata: Your image files often come packed with extra info (called EXIF data) like what camera was used, GPS coordinates, and more. It's just dead weight for an OG image. Removing it can shrink the file size without changing how the image looks one bit.
- Prioritise Next-Gen Formats: Whenever you can, serve your OG image as a WebP or AVIF. Even if an older crawler doesn't support it, you can always set a JPEG or PNG as a fallback. The performance boost on platforms that do support them is too good to pass up.
At the end of the day, a smaller og image size in kilobytes means social media crawlers can grab and display your preview faster. That means a better sharing experience and a performance-first mindset that benefits your entire site.
Automating OG Image Generation with an API
Let’s be honest, manually creating a unique OG image for every single blog post or product page is a recipe for frustration. It’s a workflow that just doesn’t scale. The hours spent fiddling in a design tool add up fast, creating a bottleneck that can even discourage you from publishing new content. This manual slog is not only slow but also a magnet for inconsistencies that water down your brand.
A much smarter way to handle this is to automate the whole process with an image generation API. Tools like PixelFiddler let you create perfectly branded and optimised OG images on the fly, just by building a URL. This transforms a tedious design chore into a simple, repeatable developer task.
How URL-Based Image Generation Works
Think of it like building with Lego blocks. You start with a base template for your OG images: a background, your logo tucked in a corner, and a placeholder for the page title. An API lets you snap these pieces together dynamically, using simple URL parameters to control how they look.
You can take a source image, pop a branded overlay on top, dynamically write in the article's title, and resize the whole thing to the perfect 1200x630 pixel og image size. The API does all the heavy lifting behind the scenes, spitting out a finished, optimised image ready for your og:image meta tag.
This approach ensures every page on your site gets a custom, high-quality social sharing image, all without anyone on your design or content team having to lift a finger.
A Practical Example with PixelFiddler
Let's see how this works in the real world. Imagine you need an OG image for a blog post titled "Getting Started with WebP". You can construct the final image URL piece by piece.
- Start with a Base Image:
First, point to your source background image, maybe one stored in a cloud bucket.
https://media.pixel-fiddler.com/my-source/background.jpg - Resize to Standard OG Dimensions:
Next, make sure it’s the right size and aspect ratio using width (
w) and height (h) parameters..../pf_w_1200,h_630/background.jpg - Add a Branded Overlay:
Now, layer your company logo over it. You can control its size, position (
gfor gravity), and padding..../pf_l_logo.png,w_200,g_south_west,x_50,y_50/background.jpg - Dynamically Insert the Title:
Finally, add the post title as a text overlay, specifying the font, size, colour, and position. The text itself is simply URL-encoded.
.../pf_t_Getting%20Started%20with%20WebP,co_white,s_70/background.jpg
By stringing these parameters together in a single URL, you create a powerful template. This URL can then be generated programmatically for every page, pulling the title directly from your CMS and slotting it in automatically.
This kind of workflow is a lifesaver for content-heavy sites. It frees up countless development hours, enforces brand consistency across thousands of pages, and ensures top-notch performance by serving optimised images every single time. If you're curious about the mechanics, our guide on how to download an image from a URL touches on some related concepts.
Optimising for Performance and Diverse Devices
Automation isn't just about saving time; it's also a massive win for performance. In Poland, screen resolutions are all over the map, from 1920x1080 (29.91%) to 2560x1440 (6.07%) and countless mobile viewports. Manually creating image variants for all of them is simply not feasible.
An API like PixelFiddler can use network-aware tuning to automatically serve the best format for the job, like AVIF, which can slash bandwidth by 50-90%. As visually-driven platforms continue to grow, this kind of high-performance imagery is no longer a "nice-to-have"—it's a necessity. You can dive deeper into social media trends in Poland to see why this matters.
When you automate your og image size and generation, you're building a scalable system that strengthens your brand, boosts site performance, and ultimately drives more engagement. It’s a core tool for any modern web platform.
How to Implement and Debug Your Open Graph Tags
Getting the image right is half the battle. If your meta tags aren't set up correctly, social media crawlers won't even see it. The secret lies in flawless implementation, and it all happens inside the <head> section of your HTML. This is where you give platforms like Facebook and X the precise instructions they need to build a great-looking link preview.
A few essential Open Graph tags do all the heavy lifting. Each one has a specific job, and together they paint a clear picture of your content for the bots that crawl your site.
The Essential Code Snippets
To get your OG image showing up properly, you need a few core tags at a minimum. Think of these as the non-negotiable foundation for social sharing.
og:title: This is simply the title of your content.og:url: This needs to be the canonical URL of the page you're sharing.og:image: The absolute URL that points directly to your preview image.og:image:width: Tells the crawler the image's width in pixels (e.g., "1200").og:image:height: And this one specifies the height (e.g., "630").
Specifying the width and height is a real pro-move. It lets the crawler render a perfectly sized placeholder straight away, without having to download and measure the image first. It’s a small detail that helps make the preview pop up just a little bit faster. If you want to speed things up, you can use our free image link generator to get the code right.
Troubleshooting with Debugging Tools
Even with perfect code, things can sometimes go sideways. Caching is usually the main suspect; a platform might cling to an old, outdated version of your OG image long after you've changed it. This is when the official debugging tools become your best friend.
These are the most common validators you'll need:
- Facebook Sharing Debugger: The original and most popular tool. It scrapes your URL and shows you exactly what Facebook sees.
- X Card Validator: The go-to for checking and troubleshooting how your link will look on X.
- LinkedIn Post Inspector: LinkedIn's own tool for checking your URL preview before you post.
Using these tools is dead simple. Just paste in your URL, and they'll fetch all the data. You’ll get a live preview and a detailed breakdown of every OG tag they found, complete with any errors or warnings.
This is a preview of the Facebook Sharing Debugger, which shows how the platform scrapes and interprets your page's Open Graph data.
The tool shows you the exact og:image URL it found and gives you a visual preview, so you can confirm the right image is being pulled.
A common fix for a stuck, outdated image is to hit the "Scrape Again" button in the debugger. This forces the platform to clear its cache for your URL and fetch the latest version of your tags and image. It often solves the problem in seconds.
By running your links through these validators before you share new content, you can catch and fix problems before anyone else sees them. It's a straightforward way to make sure your Open Graph tags are deployed correctly and that your content always looks its best online.
Got Questions About OG Images? Let's Get Them Answered
You've got the basics down, but a few nagging questions often pop up when you're in the weeds. Let's tackle the most common ones developers and marketers run into.
Can I Just Use One OG Image Everywhere?
For the most part, yes. If you're looking for a simple, effective solution, sticking to the standard 1200x630 pixels (a 1.91:1 aspect ratio) is your best bet. It’s the sweet spot that works reliably across the big players like Facebook, X (formerly Twitter), and LinkedIn.
But a "one-size-fits-all" approach isn't always perfect. If a platform like Pinterest is key to your strategy, you'll absolutely want to create a separate, taller image. Something like 1000x1500 pixels will feel native to Pinterest's vertical layout and perform much better.
I Changed My OG Image, so Why Isn't It Updating?
Ah, the classic problem. The culprit is almost always caching. The first time someone shares your link, social platforms grab your OG data and store it to load previews faster next time. When you update the image, they're often still showing that old, saved version.
To force an update, you need to tell each platform to re-fetch your page. You can do this with their official tools: head to the Facebook Sharing Debugger or the X Card Validator. Just paste your URL and hit the "Scrape Again" or "Preview Card" button to bust the cache and pull in your new image.
How Big Can My OG Image File Be?
Technically, most platforms say you can go up to 5MB or even 8MB. But you should never, ever do that. A huge image file will slow down the platform's crawler, and if it takes too long, it might just give up, leaving you with a broken preview.
As a rule of thumb, keep your OG images well under 1MB, and if you can get them under 500KB, even better. This ensures the crawlers can snatch and process your image instantly, giving you a fast, reliable preview every single time.
Does My OG Image Mess with SEO or Core Web Vitals?
Not directly, no. The og:image tag isn't rendered for a regular visitor browsing your site, so it won’t affect metrics like your Largest Contentful Paint (LCP).
However, thinking about image optimisation is a sign of good performance hygiene, which search engines definitely appreciate. Keeping all your assets lean—including the ones just for crawlers—contributes to a faster, healthier site overall. If you want to dive deeper, we have more articles on how to improve Core Web Vitals and page speed with faster images. A snappy site is always a plus for SEO.
Ready to stop worrying about OG images for good?

With PixelFiddler, you can generate, optimise, and serve perfectly sized images dynamically. It’s the easiest way to cut down on bandwidth and save yourself a ton of development time. Start for free at PixelFiddler.