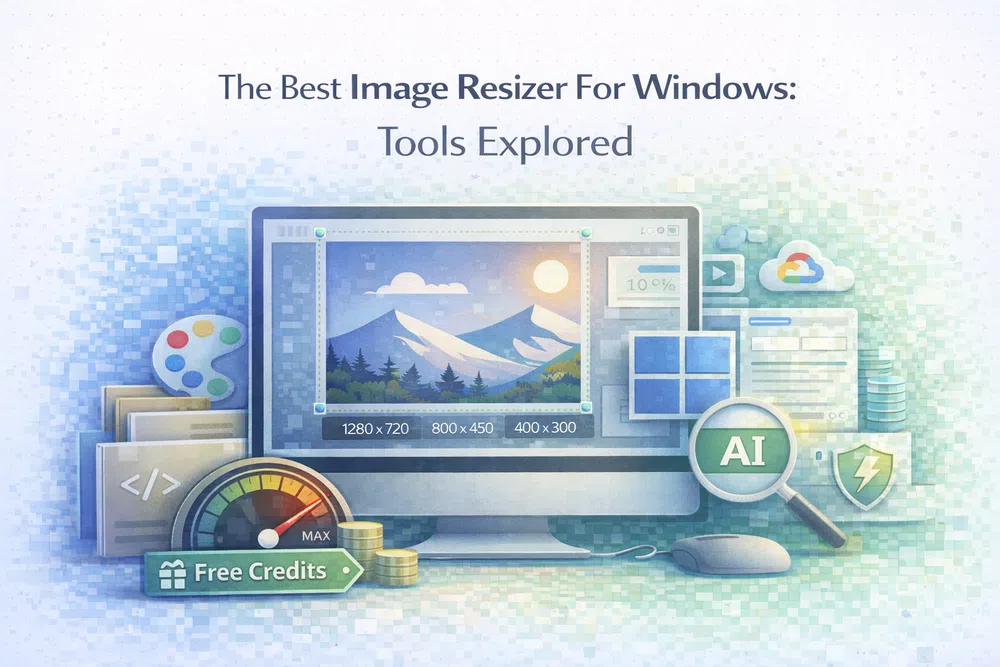
The Best Image Resizer For Windows Tools Explored
Resizing an image on Windows might seem like a basic task, but it's a critical skill for anyone running a website, whether you're a blogger or managing a large e-commerce store. The reason is straightforward: big, heavy images are the number one cause of slow websites. And slow websites frustrate visitors and get penalised by search engines. This isn't just about making a picture smaller; it’s about building a faster, more professional online presence.
Resizing an image on Windows might seem like a basic task, but it's a critical skill for anyone running a website, whether you're a blogger or managing a large e-commerce store. The reason is straightforward: big, heavy images are the number one cause of slow websites. And slow websites frustrate visitors and get penalised by search engines.
This isn't just about making a picture smaller; it’s about building a faster, more professional online presence.
Why Bother Resizing Images on Windows?
Before we jump into the different tools you can use, let's quickly cover why this small step makes such a huge difference. When it comes to web performance, every single kilobyte matters. Images are usually the heaviest things on a webpage, hogging bandwidth and taking forever to load.
That delay is more than a minor hiccup for your visitors. It’s a direct blow to your site's performance and, ultimately, your business goals.
The Real-World Cost of Big Images
The fallout from slow-loading images is immediate and easy to see. When a page lags, people get impatient and click away. This pushes up your bounce rate, which tells search engines that your site isn't delivering a good experience. For an online shop, that means lost sales, plain and simple.
Think about it this way:
- User Experience: A website that loads instantly feels polished and keeps people engaged. A sluggish one creates friction and sends potential customers straight to your competitors.
- Conversion Rates: There's a clear, proven link between page speed and sales. Research from Portent found that a site loading in one second has a conversion rate three times higher than one that takes five seconds. Every second of delay costs you money.
- Search Engine Rankings: Google uses Core Web Vitals and other page experience signals to rank websites. Slow sites get pushed down the search results, making them harder for your audience to find. You can learn more about how image optimization impacts your site's speed in our guides about improving web core vitals and page speed.
Getting a Handle on Core Web Vitals
This brings us to Core Web Vitals, which are Google's metrics for measuring how users actually experience a webpage. A key one is Largest Contentful Paint (LCP), which tracks how long it takes for the main piece of content—usually a big image—to show up on the screen.
By using an image resizer for Windows to get your visuals to the right size before you upload them, you dramatically shrink the file. This lets the browser download and display the content much faster, which directly improves your LCP score and overall site speed. We go into more detail on this in our guide to mastering First Contentful Paint.
At the end of the day, having a smart resizing workflow is one of the first and most effective steps in web optimisation. It’s your best defence against poor performance, helping you build a site that's fast, friendly for users, and loved by search engines.
Quick Resizing With Built-In Windows Tools
Sometimes you just need to resize one or two images, and downloading dedicated software feels like using a sledgehammer to crack a nut. The good news is that Windows already has a couple of handy tools baked right in, perfect for these simple, one-off jobs.
You won’t need to install a single thing.
The two mainstays are the modern Photos app and the classic MS Paint. While both can get the job done, they approach it differently. Let’s break down how each one works so you can pick the right tool for what you’re trying to accomplish.
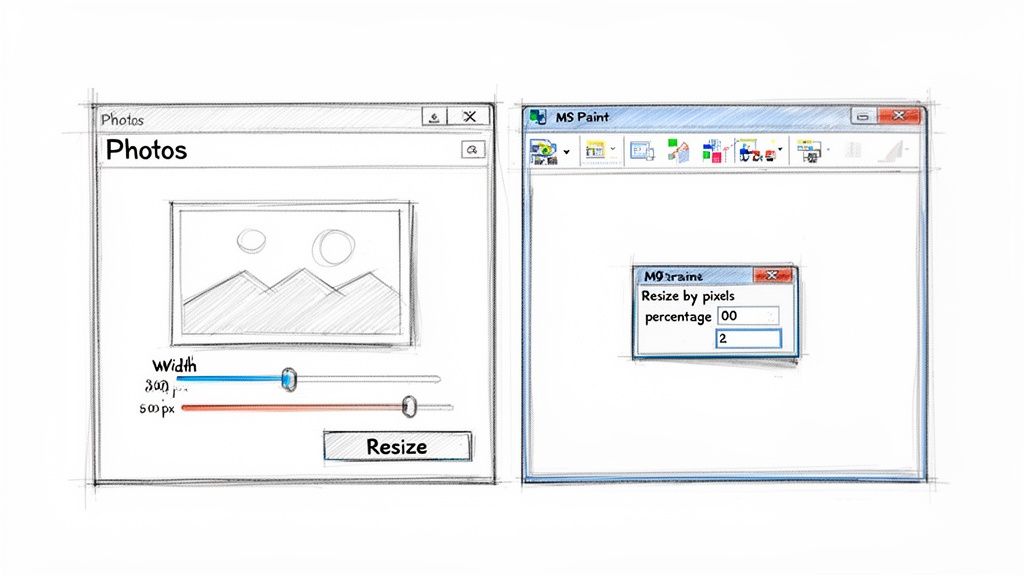
Using The Modern Photos App
The Photos app is the default image viewer on Windows 10 and 11, and it comes with a clean, no-nonsense resizer. It's my go-to when I need a fast, visual way to make an image smaller without getting lost in menus.
Just open your image in the app, click the three-dot menu icon in the top toolbar, and select Resize image. A simple dialogue box pops up, offering a few presets (Small, Medium, Large) or an option for custom dimensions.
What’s really helpful is that the app gives you an estimated file size for each preset, which is fantastic for optimising images for the web or email. If you go with Define custom dimensions, you can type in a new width or height, and the app will automatically calculate the other value to prevent any ugly distortion. It’s a clean, efficient process.
Pro Tip: The Photos app is all about simplicity. It’s perfect when you need to quickly resize a photo for a social media post, a blog update, or an email attachment and don't want to overthink it.
Getting Precise Control With MS Paint
For those moments when you need a bit more control, don't sleep on the classic MS Paint. Its interface might look like a relic from another era, but its resize function is surprisingly more flexible than what you'll find in the Photos app.
Once you have your image open in Paint, look for the Resize button in the "Image" section of the Home tab. This brings up a small window with two distinct ways to resize:
- By Percentage: This is great for relative sizing. Need the image to be exactly half its original size? Just enter 50%.
- By Pixels: When you need an image to fit an exact space—like a website banner or a profile picture—you can define the precise horizontal and vertical dimensions here.
The most important thing to watch for is the Maintain aspect ratio checkbox. I recommend keeping this ticked 99% of the time to avoid stretching or squashing your image. Unchecking it allows you to set the width and height independently, which is a niche but sometimes useful feature.
Comparing Built-In Windows Image Resizers
So, which one should you use? Here’s a quick look at how the native Photos app stacks up against MS Paint for basic resizing tasks.
| Feature | Photos App | MS Paint |
|---|---|---|
| Best For | Quick, preset-based resizing | Precise pixel or percentage control |
| Interface | Modern and intuitive | Classic and a bit dated |
| Resizing Method | Presets & custom pixels (aspect-locked) | Percentage & custom pixels |
| Aspect Ratio Control | Always maintained | Can be unlocked for freeform resizing |
| File Size Preview | Yes, for presets | No |
Ultimately, both tools are more than capable of handling simple resize jobs. The Photos app is quicker for common tasks, while MS Paint gives you that extra layer of precision when you need it.
How To Batch Resize Multiple Images At Once
Let's be honest, resizing images one by one is a soul-crushing task. If you’ve ever had to prep a gallery for a website or a batch of product photos for an online store, you know the pain. This is exactly where batch processing comes in and saves the day. Instead of clicking through the same dialogue box a hundred times, you can set your rules once and let the computer handle the rest.
Thankfully, you don't need expensive software to do this on Windows. There are a couple of fantastic free tools that make batch resizing a breeze, freeing you up for more important things. Let’s walk through two of my favourite methods.
Use Microsoft PowerToys For Simple Batch Resizing
For a quick and incredibly intuitive solution, you can't beat the Image Resizer utility that comes with Microsoft's PowerToys. It's a free collection of tools from Microsoft, and once installed, the resizer feels like it was part of Windows all along.
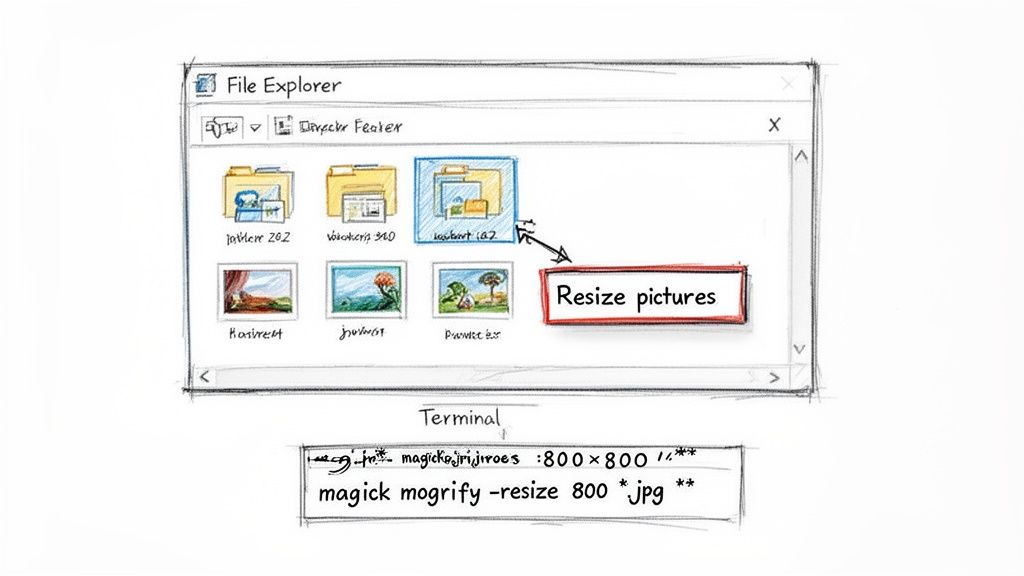
The process couldn't be simpler. You just head into File Explorer, select all the images you need to change, and right-click. From the context menu that pops up, you'll see a new option: Resize pictures.
Clicking that brings up a small, clean window. It gives you a few handy presets like Small, Medium, and Large, but also lets you punch in your own custom dimensions. A crucial feature here is the option to create copies instead of overwriting the originals—always a good idea to avoid accidentally losing your high-resolution files. For most people, this is the perfect image resizer for windows; it's visual, fast, and requires zero technical skill.
Advanced Batch Processing With ImageMagick
Now, if you're a developer, a designer, or just someone who feels more at home in the command line, ImageMagick is your go-to. This free, open-source powerhouse can handle just about any image manipulation you can think of, and it excels at high-quality batch resizing through simple terminal commands.
Once you have ImageMagick installed and added to your system's PATH, you can fire up PowerShell or Command Prompt. Let’s say you have a folder full of massive product shots at C:\product-images, and you need them all to be 800 pixels wide for your e-commerce platform.
Just navigate to that folder in your terminal and run this single command:
magick mogrify -resize 800x *.jpg
That one line tells ImageMagick to find every single JPG file (*.jpg) in that folder and resize it to a width of 800 pixels while keeping the original aspect ratio. A quick heads-up: the -mogrify command overwrites your original files, so it's smart to work on a copy of your folder. ImageMagick is incredibly versatile, allowing you to chain commands to convert formats, apply filters, and much more, all in one go.
For web developers and agencies juggling multiple client projects, a consistent image workflow is non-negotiable. While command-line tools are brilliant for automation, you might also find our collection of free online image tools handy for those one-off conversion or compression tasks.
Whether you're a right-click-and-go person or a command-line wizard, having a solid batch resizing method in your toolkit is a massive time-saver. It turns hours of tedious work into a job that takes just a few seconds, ensuring your images are always perfectly prepped for their final destination.
How Image Resizing Impacts Your Core Web Vitals
Let's be clear: getting your image sizes right is fundamental to a fast, healthy website. When you use an image resizer for Windows, you're not just shrinking a picture. You're directly influencing how your site performs in the eyes of both users and Google, particularly when it comes to Core Web Vitals.
Think about what happens when someone visits your page. Their browser has to fetch every single asset, and nine times out of ten, the images are the heaviest things on the list. If those images are huge and unoptimised, the download and render time shoots up, creating a poor experience and tanking your performance metrics.
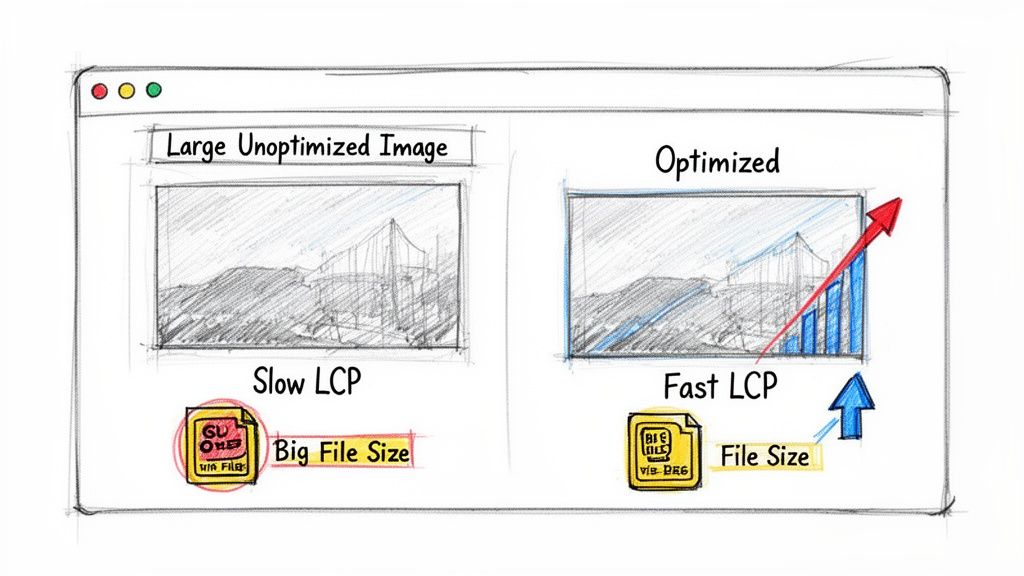
Tackling Largest Contentful Paint (LCP) Head-On
The most direct benefit of resizing your images is the improvement you'll see in your Largest Contentful Paint (LCP) score. This metric measures the time it takes for the largest element—usually a big banner or hero image—to appear on the screen.
A slow LCP is a user experience killer. It makes your page feel broken or sluggish, and many people will simply leave. By resizing images to the exact dimensions they'll be displayed in, you slash their file size. This simple change allows the browser to download and show that critical content much, much faster, leading to a better LCP score and a happier visitor.
The commercial argument for this is undeniable. Research from Portent shows that a site loading in just one second enjoys a conversion rate 3x higher than a site that takes five seconds to load. This tight link between speed and revenue turns image optimisation from a technical chore into a core business activity.
Modern Formats Are Your Secret Weapon
Resizing is the essential first step, but the file format you choose is just as critical for top-tier performance. While JPEG and PNG have served us well, modern formats offer a massive leap forward in compression technology.
- WebP: This format, developed by Google, consistently delivers images that are 25-34% smaller than their JPEG equivalents with no noticeable loss in quality.
- AVIF: The new kid on the block, AVIF pushes compression even further. It can often produce files that are a staggering 50% smaller than JPEGs of similar visual quality.
By embracing formats like WebP and AVIF, you give your LCP and other Core Web Vitals another significant boost. The images load quicker, and the user's journey feels seamless. If you want to get into the details, have a look at our guide on converting PNG to AVIF.
When you see image resizing as a tool for improving Core Web Vitals, it stops being a simple task and becomes a powerful strategy. It's how you boost your SEO, increase conversions, and build a better user experience from the moment someone lands on your site.
Automate Image Resizing With An API
When you're dealing with images at scale, manual resizing just doesn't cut it. It becomes a massive bottleneck. Batch processing is certainly a step up, but if you really want to streamline your workflow, an automated, API-first approach is the way to go. It lets you deliver perfectly resized and optimised images on the fly, without ever having to touch your original high-resolution files.
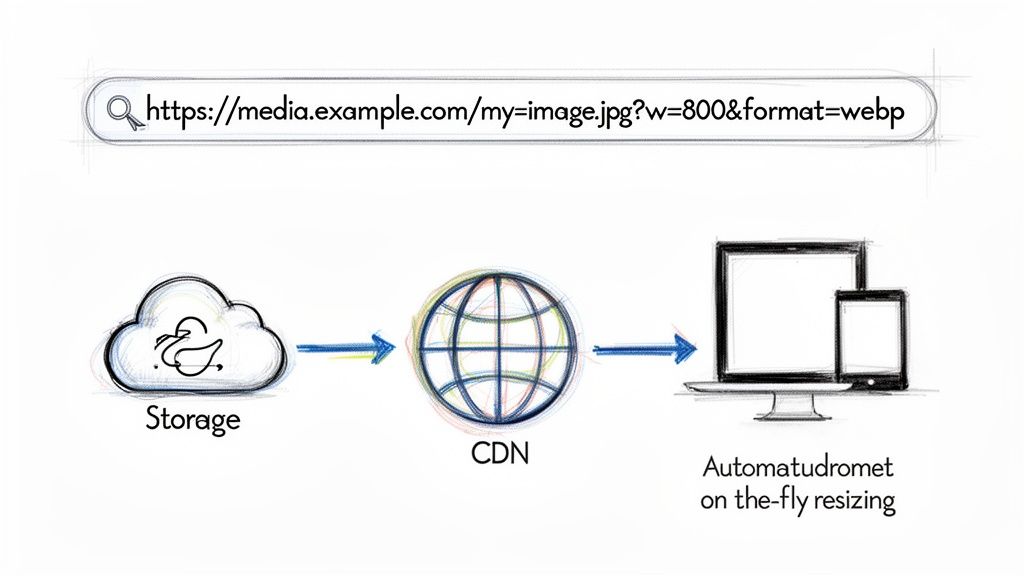
The concept is surprisingly simple. You hook up your existing cloud storage—whether it’s Amazon S3, Azure Blob Storage, or Google Cloud—and then just tweak your image URLs. All the heavy lifting, the transformations and optimisations, are handled directly through URL parameters. This completely sidesteps any need for tedious preprocessing.
On-The-Fly Transformations
Let's say you have a high-resolution product photo sitting in your cloud bucket. To get a smaller, web-friendly version, you don’t have to create a separate file. Instead, you just modify the URL.
A standard URL might look something like this:
https://media.pixel-fiddler.com/my-source/media/my-image.jpg
Now, if you want to resize that image to 800 pixels wide and convert it to the modern WebP format, you just add a couple of parameters:
https://media.pixel-fiddler.com/my-source/media/my-image.jpg?w=800&format=webp
The API takes care of the resizing and conversion instantly. This dynamic approach means you can maintain a single, high-quality source image and generate countless variations without cluttering your storage or running endless manual batch jobs.
This isn't just about convenience; it's a solid performance strategy. By serving the best format for each browser and using a global Content Delivery Network (CDN), you can guarantee lightning-fast delivery to users anywhere in the world.
For development teams on Windows, this kind of intelligent image optimisation can slash bandwidth usage by a staggering 50-90%. By delivering perfectly sized images in next-gen formats with legacy fallbacks, companies can cut CDN costs and dramatically improve global page speeds—all without constant developer intervention.
The Benefits Of An API-Driven Workflow
Switching to an API for image resizing brings some serious advantages over the old-school methods. It effectively offloads the entire optimisation task from your local machine to a specialised, distributed network built for pure speed and reliability.
Here are the most significant benefits:
- No More Preprocessing: Forget running scripts or using desktop tools to prep images before you upload them. The API does all the work in real time.
- Future-Proof Format Delivery: The system is smart enough to serve AVIF or WebP to modern browsers while automatically providing JPEG or PNG fallbacks for older ones.
- Global CDN Delivery: Images get cached on edge servers across the globe, ensuring the fastest possible load times for every user, no matter where they are.
- A Single Source of Truth: You only ever need to store and manage one high-resolution version of each image. It keeps your whole asset management pipeline clean and simple.
This approach truly transforms your image handling from a manual, reactive chore into a scalable, automated system. It ensures every user gets a fast, visually crisp experience, every single time. To dig a bit deeper into handling remote assets, you might find our guide on how to download an image from a URL useful.
Frequently Asked Questions
Got questions? You're not alone. When it comes to resizing images on Windows, a few common queries pop up time and again. Let's tackle some of the most frequent ones to help you get the best results.
Does Resizing An Image Reduce Its Quality?
It’s a great question, and the honest answer is: it depends. Resizing an image can definitely affect its quality, but the impact changes depending on whether you're making it bigger or smaller.
When you shrink an image (downsizing), the software cleverly discards pixels to fit the new, smaller dimensions. While you are technically losing data, the visual quality often looks just as good, especially if you start with a high-resolution photo. The trick is to resize it just once to its final intended size.
On the other hand, making an image larger (upsizing) is where you really run into trouble. This forces the software to invent new pixels to fill the extra space, and the results are rarely pretty. This process, called interpolation, almost always leads to a blurry, soft, or noticeably pixelated image.
What Is The Best Tool For Batch Resizing On Windows?
The "best" tool really comes down to your technical comfort level and what you're trying to achieve.
For most people, the Image Resizer utility that comes with Microsoft PowerToys is the perfect solution. It's free, integrates right into your File Explorer context menu (just right-click!), and is incredibly straightforward. It makes resizing dozens of photos a breeze.
However, if you're a developer or a power user who needs to automate complex workflows with scripts, ImageMagick is the undisputed champion. It’s a command-line tool that gives you granular control over every single aspect of the resizing process.
Should I Resize Images Before Uploading Them To My Website?
Yes, 100% yes. This is probably one of the most important things you can do for your website's performance.
A common mistake is uploading a huge, high-resolution image and then just shrinking it with HTML or CSS. While it might look the right size on the page, your visitors' browsers are still forced to download the entire massive file. This absolutely kills your loading speed and can harm your Core Web Vitals.
Research from Portent found that a site loading in one second has a conversion rate 3x higher than one that takes five seconds. Speed isn't just a vanity metric; it directly impacts your bottom line.
For optimal performance and SEO, always resize your images to the exact dimensions they will be displayed at before you upload them. Or, even better, use a modern image optimisation API to automate the entire process and deliver perfectly sized images to every user, every time.
Stop wrestling with manual resizing and start delivering lightning-fast images on autopilot. PixelFiddler offers a powerful API that automates image optimisation, from on-the-fly resizing and format conversion to global CDN delivery. Try PixelFiddler for free and see the difference.