PNG to AVIF: A Practical Guide on How to Convert PNG to AVIF
If you're serious about web performance, switching from PNG to AVIF isn't just a minor tweak—it's a strategic upgrade. I've seen this one change deliver file sizes that are a staggering 70% smaller with absolutely no visible drop in quality. That kind of saving has a massive knock-on effect, speeding up your page loads and directly influencing user experience and search engine rankings.
If you're serious about web performance, switching from PNG to AVIF isn't just a minor tweak—it's a strategic upgrade. I've seen this one change deliver file sizes that are a staggering 70% smaller with absolutely no visible drop in quality. That kind of saving has a massive knock-on effect, speeding up your page loads and directly influencing user experience and search engine rankings.
Why PNG To AVIF Is A Game Changer For Web Performance
In today's fast-paced digital world, speed is everything. Users have zero patience for slow websites, and search engines like Google actively reward pages that load in a flash. This is where converting your images from PNG to AVIF stops being a simple format swap and becomes a core part of your performance strategy.
PNG has been a workhorse for years, especially for any image needing a transparent background. The problem is, its lossless compression often leads to chunky file sizes, especially for complex graphics. Those large files act like an anchor, dragging down your page speed and harming those all-important performance metrics.
AVIF, however, was built from the ground up for the modern internet. It borrows its powerful compression technology from the AV1 video codec, resulting in incredibly small files for both lossy and lossless images. And it does this while fully supporting transparency and wide colour gamuts, making it a true next-generation format.
The Direct Impact On Core Web Vitals
Google’s Core Web Vitals are the metrics that matter. They measure real-world user experience by looking at loading performance, interactivity, and visual stability. More often than not, large images are the main reason for poor scores, and this is where a png to avif conversion can make a real, measurable difference. Improving your site's Core Web Vitals and overall page speed with faster images leads to better user engagement and SEO.
The metric most affected is the Largest Contentful Paint (LCP), which tracks how long it takes for the biggest visual element—usually a hero image—to appear. A slow LCP, often caused by a heavy PNG, gives users the immediate impression that your site is sluggish.
By switching to a much lighter AVIF file, you can drastically reduce the time it takes for this key element to load. Google recommends an LCP of 2.5 seconds or less, and image optimisation is one of the most effective ways to achieve this goal.
This isn't just theory. The e-commerce world, where every millisecond can impact the bottom line, has seen massive benefits. Early e-commerce adopters report significant reductions in image weight and measurable improvements in Core Web Vitals after switching to AVIF.
PNG vs AVIF At a Glance
To put it all into perspective, here’s a quick rundown of how PNG and AVIF stack up against each other. This table really highlights the technical advantages that make AVIF the clear winner for modern web development.
| Feature | PNG (Portable Network Graphics) | AVIF (AV1 Image File Format) |
|---|---|---|
| Primary Compression | Lossless only (DEFLATE algorithm) | Both lossy and lossless (based on AV1 video codec) |
| File Size | Large, especially for complex images with transparency | Significantly smaller (often 50-70% less than PNG) for comparable or better quality |
| Transparency (Alpha) | Yes, but can add significantly to file size | Yes, with much more efficient compression, leading to smaller transparent files |
| Colour Depth | Typically 8-bit (16.7 million colours) | Supports 8, 10, and 12-bit colour depth, enabling High Dynamic Range (HDR) and wide colour gamuts |
| Animation | Not natively supported (requires APNG extension) | Supported, allowing for animated image sequences in a highly compressed format |
| Browser Support | Universal (supported by all browsers for decades) | Widespread in modern browsers (Chrome, Firefox, Safari, Edge), but requires fallbacks for older ones |
| Ideal Use Case | Logos and simple graphics where lossless quality is essential | Almost everything: photos, complex graphics, logos, and images requiring transparency |
As you can see, while PNG remains a reliable format, AVIF offers superior compression, better features, and the flexibility needed to deliver a truly fast user experience.
Beyond The File Size Advantage
While the dramatic reduction in file size gets all the headlines, AVIF brings a lot more to the table. Its feature set is simply more advanced than what PNG can offer.
- Superior Transparency Handling: AVIF's handling of alpha transparency is far more efficient. This means you get those crisp, clean edges for logos and UI elements, but in a much smaller file.
- High Dynamic Range (HDR) and Wide Colour Gamut: With support for 10-bit and even 12-bit colour, AVIF can display incredibly rich, vibrant images with smooth gradients. This effectively eliminates the colour banding you sometimes see in 8-bit formats like PNG.
- Both Lossless and Lossy Compression: This flexibility is a huge plus. You can choose pixel-perfect lossless compression for detailed graphics or use its incredibly smart lossy compression for photographs where you won't notice the difference—except in the file size.
Ultimately, by making the png to avif switch, you’re not just shrinking files. You’re future-proofing your site’s visual content and delivering a faster, richer experience to your users. Tools like PixelFiddler can even automate this whole process, serving highly optimised AVIF images on the fly and giving your website a measurable competitive edge.
Mastering Manual PNG to AVIF Conversions
For those of us who like to get our hands dirty, manually converting PNGs to AVIF is the best way to really understand the format's strengths. This approach gives you absolute control, letting you fine-tune every setting to hit that perfect sweet spot between a tiny file size and crisp visual quality. Let's dig into the best tools for the job, starting with the command line.
Command-Line Conversion With Avifenc
If you live in the terminal, avifenc is your go-to. It's the official, high-performance encoder from the Alliance for Open Media, and it’s packed with options. This is the tool I reach for when I need perfectly reproducible results or want to script a batch of conversions.
At its simplest, converting a file is a one-liner. To turn logo.png into logo.avif, you just run:
avifenc logo.png logo.avif
But the real power comes from the command-line flags. This is where you can dial in the exact compression you need. For instance, the --min and --max flags set the quality range (from 0 for worst to 63 for best), while the -s flag controls the encoding speed (from 0 for the slowest and highest quality to 10 for the fastest).
Here are a few essential flags I use all the time:
- -q [0-63]: Sets a specific quality level. For most lossy images, a value between 20 and 30 is a great starting point.
- -y 444: This flag forces full chroma sampling, which is crucial for preserving sharp colour details in graphics and preventing that smudgy colour bleed you can see with aggressive compression.
- --lossless: Use this to create a pixel-perfect AVIF. It’s perfect for UI elements or detailed logos where you can't tolerate any artifacts.
For a high-quality, lossy conversion that looks great without being massive, a typical command I'd run looks like this:
avifenc -q 25 -s 4 input-image.png output-image.avif
This tells the encoder to target a quality level of 25 at a moderate speed, which usually gives me an excellent balance for photos.
Using Graphical Tools For Visual Feedback
Not a command-line fan? No problem. Plenty of desktop and web apps make PNG to AVIF conversion incredibly easy, especially if you're a visual person. These tools are fantastic for quick, one-off jobs or for just playing with the settings to see what they do in real time.
My favourite is Squoosh, a web app from the Google Chrome team. Its killer feature is the side-by-side viewer with a slider. You can drag it back and forth to instantly compare your original PNG with the compressed AVIF.
This immediate feedback loop is a game-changer. As you tweak the "Effort" slider or adjust the quality, the app shows you the file size savings in real time. It makes finding that optimal balance between quality and size incredibly fast and intuitive.
For a more powerful, desktop-based solution, the open-source editor GIMP has great AVIF support. The process is simple:
- Open your PNG file in GIMP.
- Navigate to
File > Export As... - Just change the file extension to
.avifin the name field. - Click "Export," and a dialogue box will pop up with AVIF options like quality and speed.
These visual tools take all the guesswork out of the process. They let you experiment freely without having to memorise terminal commands, making them a perfect starting point if you're new to AVIF.
Balancing Quality and File Size
The real art of PNG to AVIF conversion is finding that balance. Since PNG is a lossless format, your source file is a perfect copy. AVIF can also be lossless, but its main superpower is its incredibly efficient lossy compression.
For graphics with sharp lines and solid colours, like logos or icons, I usually start with AVIF's lossless mode. The file size reduction won't be as mind-blowing as with a photo, but it will almost always be smaller than the original PNG. If you're really trying to squeeze every byte, our guide on converting PNG to WebP has some extra tips that also apply here.
When it comes to photos, you can get much more aggressive. A quality setting that shaves off 60-80% of the file size often results in an image that looks identical to the original PNG to the naked eye. The key is to always double-check your work on a high-resolution screen to spot any weirdness in detailed areas or smooth gradients. This is why manual conversion is so powerful—it gives you the final say on every single image.
Automating Image Optimisation At Scale
Manually converting images one by one is fine when you're just tweaking a few assets, but it completely breaks down at scale. Imagine trying to manage hundreds, thousands, or even millions of images that way. It’s slow, tedious, and a recipe for inconsistency. For any modern web application, automation isn't just a nice-to-have; it's an absolute necessity.
An automated workflow ensures every single image on your site gets the same optimisation treatment, saving your team from endless manual work and delivering a consistently fast experience to your users. Instead of running commands or dragging files into a tool, you can build these conversions right into your development and deployment pipelines.
Integrating Optimisations Into Your Build Process
One of the most straightforward ways to automate image conversion is to weave it directly into your application's build process. If you're using modern front-end tools like Webpack or Vite, you're in luck—their plugin ecosystems are brilliant for this.
The idea is simple: when your app is compiled for production, a plugin automatically finds your PNGs, converts them to AVIF, and cleverly updates the references in your code. This lets you work with familiar PNGs during development, while the highly optimised AVIF versions are generated just-in-time for deployment.
- For Webpack users: Check out plugins like
image-minimizer-webpack-plugin. You can configure it to use encoders likesquooshto handle thepng to avifconversion. - For Vite users: Tools like
vite-imagetoolsorvite-plugin-image-optimizeroffer similar magic, transforming images as a seamless part of the build pipeline.
This approach is fantastic for your static assets—the images that are a core part of your application, like logos, icons, and other UI elements. It's less ideal, however, for user-generated content or massive, dynamic image libraries that are always changing.
Key Takeaway: Build-time optimisation is perfect for project-based assets. It handles the conversion automatically without needing any server-side infrastructure, guaranteeing your core visuals are always served in the most efficient format.
The Power Of On-The-Fly Image Transformation
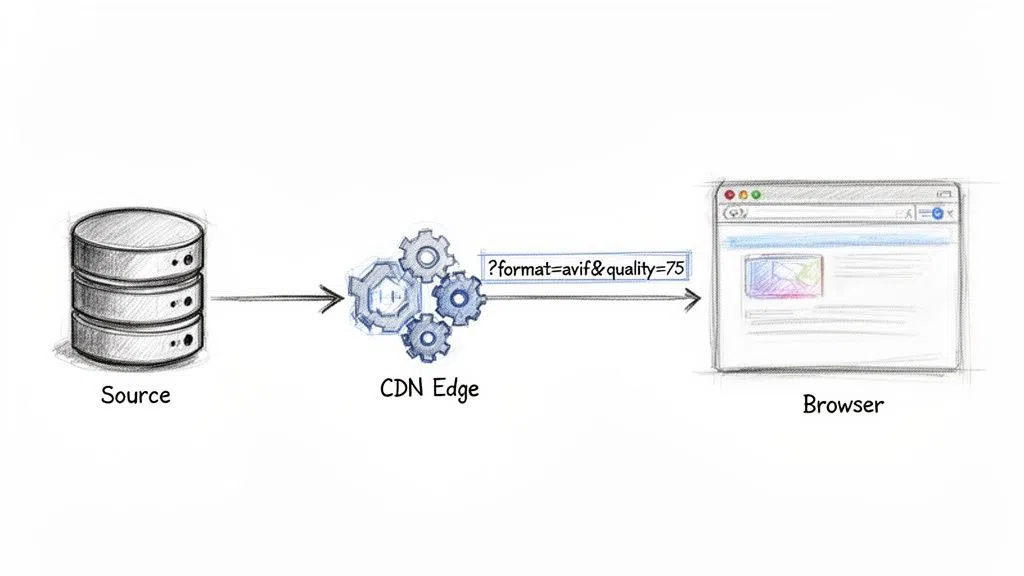
When you’re dealing with a large or constantly changing image catalogue—think e-commerce sites, media platforms, or social networks—you need something more powerful. This is where on-the-fly image transformation, typically handled by a modern image CDN, really shines.
Instead of pre-converting every single image, this method generates the optimised version in real-time, the very first time it's requested. The result is then cached on a global edge network and served instantly to all future visitors. The best part? It’s all controlled through simple changes to the image URL.
This approach completely decouples your original source images from what gets delivered to the browser. You can keep your high-quality PNGs tucked away in cloud storage (like Amazon S3 or Google Cloud Storage) and let a service like PixelFiddler do all the heavy lifting.
A typical workflow is incredibly clean:
- Store your original file, say
my-image.png. - Reference it in your code using the image CDN's URL.
- Add simple parameters to the URL to tell it what to do.
For example, you might start with a standard PNG image URL:
https://media.pixel-fiddler.com/my-source/media/my-image.png
To turn it into a high-quality AVIF on the fly, you just add a couple of parameters:
https://media.pixel-fiddler.com/my-source/media/my-image.jpg?format=avif&quality=75
That one small change tells the CDN to grab the original PNG, convert it to an AVIF at 75% quality, and serve that to the user. It's an unbelievably scalable way to handle png to avif conversions without ever touching the source file. For those using Next.js, our guide on optimising images in Next.js applications dives into even more detailed strategies.
For content platforms managing huge libraries, on-the-fly transformation is a game-changer. One survey of media sites found that AVIF converters slashed PNG file sizes by 70% on average—turning a 2MB hero image into a 580KB AVIF—and improved LCP scores by 35%. You can explore the full findings on media site performance for a deeper look.
By moving to an automated, URL-based system, you eliminate manual toil and ensure your website is always serving the fastest, most efficient images possible. This doesn't just boost your Core Web Vitals and SEO rankings; it can also make a serious dent in your bandwidth costs.
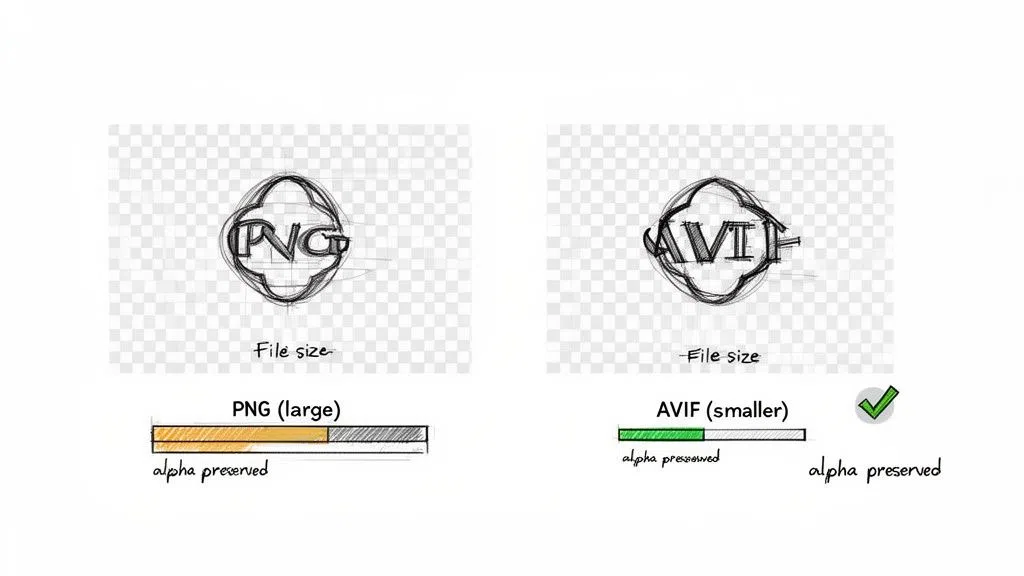
Preserving Transparency and Quality in Your Conversions
One of the biggest reasons developers have stuck with PNG for so long is its bulletproof support for alpha transparency. For years, it's been the default choice for anything with a clean, see-through background, from logos and icons to complex UI elements. But clinging to PNG just for transparency means you're leaving a huge amount of performance on the table.
The great news is that switching from png to avif doesn't mean you have to give up this essential feature. AVIF was built from the ground up to handle transparency, and it does so far more efficiently. You often end up with transparent images that are just a fraction of the size of their PNG originals.
Lossless vs Lossy: A Crucial Distinction
Getting a handle on the difference between lossless and lossy compression is absolutely key to mastering your image conversions. PNG is a purely lossless format, which means it keeps every single pixel of the original image intact. That’s fantastic for sharp-edged graphics, but it's also why those file sizes can get so chunky.
AVIF, on the other hand, gives you the best of both worlds. It can do both lossless and incredibly smart lossy compression, letting you pick the right approach for each image.
- Lossless AVIF: This mode behaves just like PNG, delivering pixel-perfect fidelity. It’s your go-to for crisp UI components, detailed icons, or logos where even the slightest compression artefact would be a deal-breaker. The best part? Even in lossless mode, an AVIF is often smaller than the source PNG.
- Lossy AVIF: This is where the real magic happens for photos or more complex graphics. AVIF's lossy compression is so advanced that it can slash file sizes by 70% or more, with changes that are practically invisible to the naked eye.
Choosing correctly between these two is fundamental to a good optimisation strategy.
Practical Scenarios: When to Use Each
Knowing the theory is one thing, but applying it is what counts. Let's walk through a couple of real-world scenarios to make the choice obvious.
First, imagine a company logo with sharp text and a transparent background. For this, lossless AVIF is the undisputed winner. If you tried using lossy compression, you might see tiny, fuzzy artefacts creep in around the text, which would cheapen its professional look. Go lossless, and you get perfect quality and a file size reduction.
Now, think about a hero image—a product that’s been carefully cut out from its background. It has soft drop shadows and lots of fine detail. This is a perfect candidate for an intelligent lossy AVIF. You can set a quality level—say, 75%—that drastically shrinks the file size while keeping the transparency and subtle shadow details perfectly intact. The tiny amount of data lost will be imperceptible, but the performance boost will be massive. After all, faster images are a cornerstone of improving your site's Core Web Vitals and overall page speed.
When in doubt, start with a high-quality lossy setting and just look at the result. You'll often find you can get away with more compression than you'd expect, especially for busy, photographic images.
Controlling Quality for the Best Results
Fine-tuning your conversions is how you squeeze out every last drop of performance without degrading the user experience. When you’re using an on-the-fly service like PixelFiddler, this level of control is as simple as adding a parameter to a URL.
For that transparent product shot we mentioned, you could use a URL transformation to ensure it looks fantastic:
https://media.pixel-fiddler.com/my-source/media/product-shot.png?format=avif&quality=80
That one line tells the system to convert the PNG to AVIF and apply an 80% quality setting, striking that perfect balance. For a logo where you need absolute perfection, you'd specify lossless compression instead:
https://media.pixel-fiddler.com/my-source/media/company-logo.png?format=avif&lossless=true
Once you understand these nuances, you can confidently move your entire image library from PNG to AVIF, keeping every asset looking pristine while unlocking huge improvements in your page load times.
Implementing Fallbacks For Universal Browser Support
Switching from PNG to AVIF brings some serious performance boosts, but what about visitors stuck on older browsers? It's a valid concern. While modern browser support for AVIF is excellent, leaving even a small fraction of your audience with broken images is a non-starter.
That's where a solid fallback strategy comes in. The idea is simple: serve the highly optimised AVIF file to browsers that can handle it, and provide a classic format like PNG to those that can't. This way, everyone sees the image, but most of your users get a much faster experience.
The best tool for this job, hands down, is the HTML <picture> element. It's built for exactly this scenario, letting you offer the browser a menu of image options. The browser simply goes down the list and picks the first one it recognises.
The Modern Approach Using The Picture Element
The logic of the <picture> tag is beautifully straightforward. You list your image sources from most to least preferred. In our case, that means putting the AVIF version first, maybe a WebP as a second option, and finally the original PNG as the universal safety net.
Here’s what that looks like in practice. You can drop this right into your code:
With this setup, a browser that understands AVIF grabs image.avif and stops there. If it doesn't know AVIF but supports WebP, it'll download image.webp. And if it's an old-timer that supports neither, it just falls back to the reliable <img> tag and loads the PNG. It’s a clean, future-proof solution that works without a single line of JavaScript.
By adding this simple HTML snippet, you’re delivering a fast, modern experience to the vast majority of users while ensuring nobody gets left behind. This has a direct, positive impact on your Core Web Vitals by shrinking file sizes wherever possible.
And if you ever need to go the other way, our guide on converting AVIF back to PNG covers a few workflows where that might be necessary.
To give you a clearer picture of who needs a fallback, here’s a quick look at where browser support stands today.
AVIF Browser Support Snapshot
This table summarises current browser support for the AVIF format, helping you understand where fallbacks are most critical.
| Browser | Support Status | First Version |
|---|---|---|
| Chrome | ✅ Supported | 85 |
| Firefox | ✅ Supported | 93 |
| Safari | ✅ Supported | 16.4 |
| Edge | ✅ Supported | 91 |
| Opera | ✅ Supported | 71 |
As you can see, support is strong across the board, but older versions of these browsers will definitely need the fallback to render images correctly.
Automating Fallbacks With An Image CDN
Manually creating three versions of every single image and writing <picture> tags for all of them can get old fast, especially on a site with a large media library. This is where a modern image CDN like PixelFiddler can be a lifesaver by automating the whole process.
Instead of putting the logic in your frontend code, this approach lets the server do the heavy lifting. When a browser requests an image, it sends an Accept header that lists all the image formats it can display.
An intelligent CDN reads this header and serves the best format automatically.
- If
image/avifis in theAcceptheader, the CDN sends the AVIF version. - If not, but
image/webpis listed, it serves WebP. - If neither is an option, it defaults to the original format, like PNG or JPEG.
This server-side technique is known as content negotiation, and it's incredibly efficient. You just use a standard <img> tag in your HTML, and the CDN figures out the rest behind the scenes. It means less code for you to manage, no need to manually generate different image files, and peace of mind knowing every user gets the most optimised image their browser can handle. It's the ultimate "set it and forget it" solution.
Answering Your PNG to AVIF Questions
Making the switch to a new image format like AVIF often brings up a few common questions. Let's tackle the big ones so you can move forward with confidence.
Will I Lose Image Quality When Converting from PNG to AVIF?
Not if you do it right. AVIF is remarkably versatile, offering both lossless and lossy compression, which gives you complete control.
For things like logos, icons, or detailed diagrams where every single pixel counts, you can use lossless AVIF. This guarantees a perfect, pixel-for-pixel match with the original PNG, often while still managing a smaller file size.
For more photographic images, AVIF's lossy compression is where it truly shines. In many cases, AVIF can reduce PNG file sizes by 50–70% with no perceptible quality loss. It's all about finding that sweet spot, and modern tools make this process surprisingly straightforward.
How Do I Handle Browsers That Don't Support AVIF?
The most robust and up-to-date way to handle this is with the HTML <picture> element. It lets you provide a list of image sources, and the browser simply works its way down the list until it finds a format it understands. You'd put AVIF first, maybe WebP second, and then your original PNG as a reliable fallback.
This method ensures your users get the fastest-loading image their browser can handle, and no one ever sees a broken image. An even better approach is to let an image CDN automate this entirely. By reading the browser's
Acceptheaders, it can serve the optimal format on the fly, with zero changes to your front-end code. This is a massive win for your site's Web Core Vitals and page speed.
Can I Convert Thousands of PNG Images to AVIF at Once?
Absolutely, but trying to do this on your own machine with local scripts can be a slow, resource-intensive nightmare. A much smarter and more scalable solution is using an API-driven image service that hooks directly into your cloud storage, like an Amazon S3 bucket.
With this setup, you can transform images to AVIF just by changing a few parameters in the image URL. It completely automates the conversion for your entire library, no matter how many images you have, saving you from the headache of manual scripts and batch jobs.
For example, a simple URL request could trigger the conversion automatically:
https://media.pixel-fiddler.com/my-source/media/my-image.jpg

Ready to boost performance and cut down your bandwidth bills? With PixelFiddler, you can automate your png to avif conversions, set up smart fallbacks, and serve lightning-fast images to every user. Start optimising in minutes. Explore the power of on-the-fly image transformations with PixelFiddler.