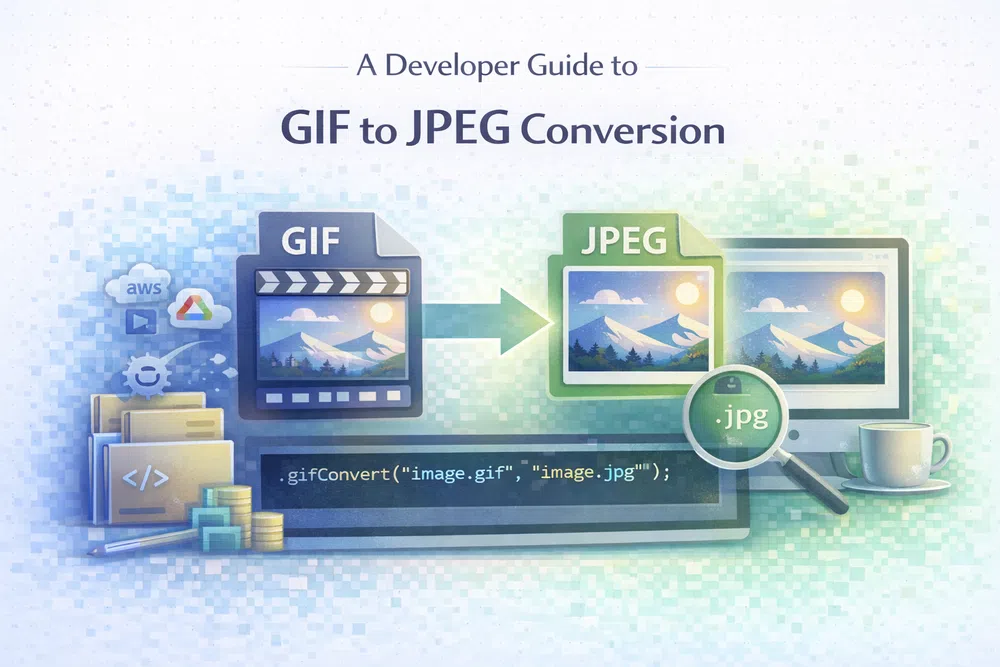
A Developer Guide to GIF to JPEG Conversion
If you're still using a static GIF where a JPEG would do, you're almost certainly hurting your page load times. It's a common oversight, but GIFs are an outdated and inefficient format for static images, often creating files that are massively larger than a well-optimised JPEG. Switching from GIF to JPEG isn't just a simple file conversion; it’s a strategic decision to slash bandwidth, speed up rendering for your visitors, and give your Core Web Vitals a much-needed boost.
If you're still using a static GIF where a JPEG would do, you're almost certainly hurting your page load times. It's a common oversight, but GIFs are an outdated and inefficient format for static images, often creating files that are massively larger than a well-optimised JPEG. Switching from GIF to JPEG isn't just a simple file conversion; it’s a strategic decision to slash bandwidth, speed up rendering for your visitors, and give your Core Web Vitals a much-needed boost.
Why You Should Convert GIF to JPEG
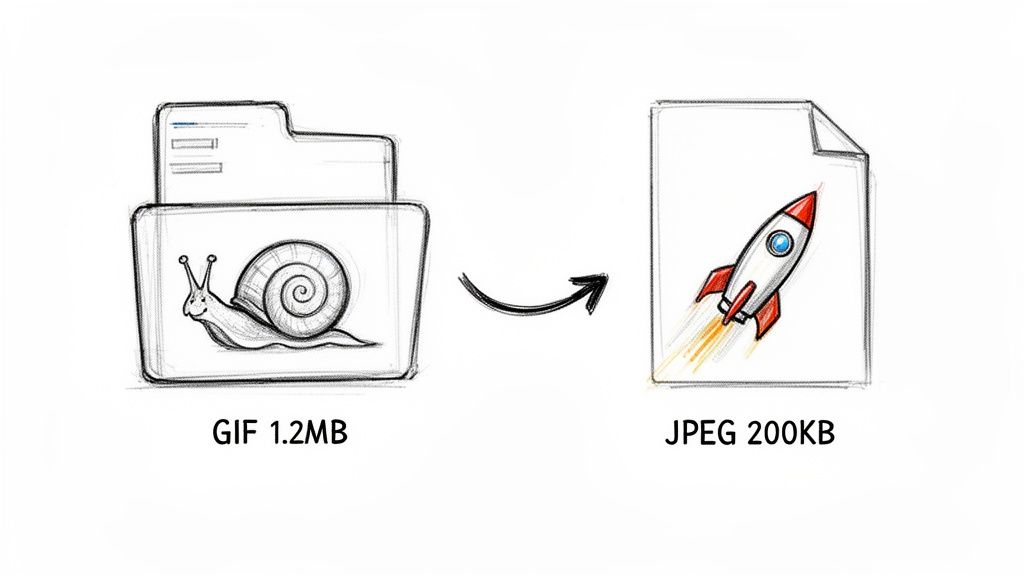
At its core, the reason to convert a static GIF to a JPEG comes down to one thing: performance. GIFs rely on a lossless compression method that’s fantastic for simple graphics with flat colours but terrible for photographic images, resulting in bloated files. JPEGs, on the other hand, use lossy compression, a clever technique that discards imperceptible data to shrink file sizes dramatically with very little, if any, noticeable drop in quality.
This isn't a new trend. The move from GIF to JPEG for photos reflects a fundamental web optimisation principle that dates back to the early 90s. When GIF appeared in 1987, it was revolutionary. But once JPEG arrived in 1992 with its incredible compression ratios—often achieving 10:1 to 20:1—it quickly became the go-to standard for photographic content. Developers back then jumped on conversion tools to cut bandwidth costs and make their sites faster, a best practice that’s even more critical today.
Performance and User Experience
As a developer, this conversion is one of the easiest performance wins you can get. A smaller file means the browser downloads and renders the image faster. It's that simple.
The direct benefits for your website are immediate:
- Faster Page Load Times: Lighter images mean quicker downloads, a huge advantage for users on mobile or slower network connections. For a deeper dive, learn how to improve your page speed thanks to faster images.
- Improved Core Web Vitals: Smaller images directly help your Largest Contentful Paint (LCP) score, a critical metric for both user experience and SEO rankings. We'll explore how to improve Web Core Vitals later on.
- Lower Bandwidth Costs: Serving smaller files reduces your data transfer overhead. On high-traffic sites, these savings can be substantial.
Think of it this way: using a static GIF for a photo is like sending a text-only email as a multi-megabyte PDF. Sure, it gets the message across, but it's incredibly inefficient. A JPEG is the purpose-built, lightweight tool for the job.
When JPEG is the Right Choice
So, when should you reach for a JPEG? It's the ideal format for photographs, complex images with smooth gradients, and any static visual that doesn't need transparency. Its ability to manage millions of colours makes it far superior to GIF's limited 256-colour palette for these kinds of images.
Let's break down the key differences that impact web performance.
GIF vs JPEG Key Differences for Web Performance
| Feature | GIF (Graphics Interchange Format) | JPEG (Joint Photographic Experts Group) |
|---|---|---|
| Best Use Case | Simple animations, logos, and graphics with limited colours. | Photographs, complex static images, and multi-coloured graphics. |
| Colour Palette | Limited to 256 colours. | Supports up to 16.7 million colours. |
| Compression | Lossless (LZW algorithm). Preserves all data but is inefficient for photos. | Lossy. Discards some data to achieve much smaller file sizes. |
| Transparency | Supports basic, 1-bit transparency (a pixel is either fully on or off). | Does not support transparency. |
| File Size | Larger for photographic images due to inefficient compression. | Significantly smaller for photographic images. |
| Key Weakness | Poor colour depth and large file sizes for complex, static images. | Not suitable for animations or images requiring sharp, crisp lines. |
Ultimately, choosing the right format is about understanding the trade-offs. While both have their place, using the wrong one can have a real impact on your site's performance. Many of these principles also apply when comparing other formats; our guide on the technical trade-offs between PNG vs JPG explores this in more detail.
How to Convert GIF to JPEG with an API
If you're managing images at scale, converting them one by one is a non-starter. Manual conversions are slow, tedious, and just don't fit into a modern development workflow. This is where a URL-based API like PixelFiddler really shines, giving you the power to transform images on the fly just by tweaking a few URL parameters. For a quick test, you can try our free GIF to JPG converter tool.
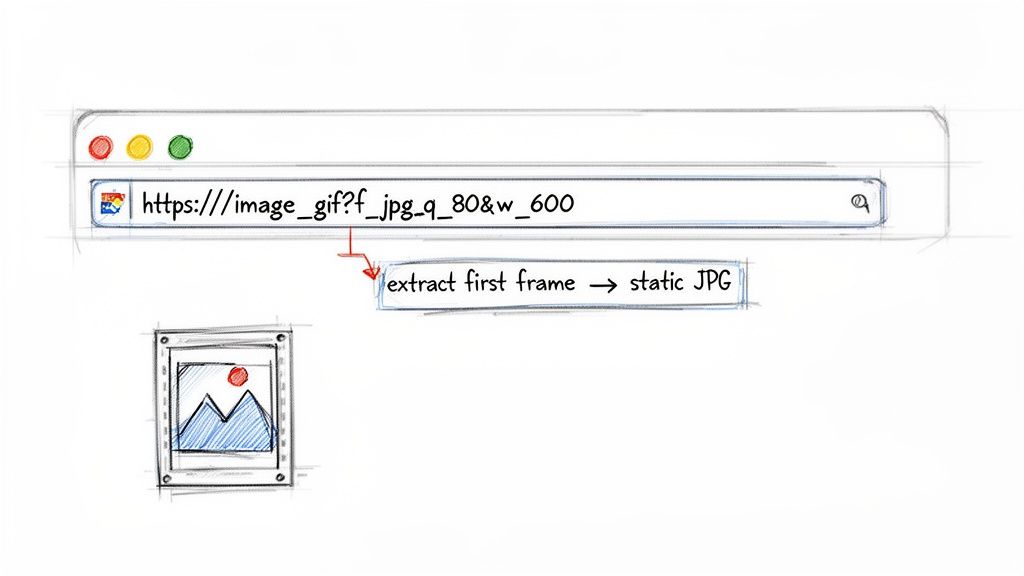
The whole process is surprisingly simple. At its core, you just add a format parameter to your image’s source URL. This tells the API to serve the image as a JPEG instead of its original GIF format. It's important to know that this operation extracts the first frame of the GIF to create a static JPEG, which is exactly what you need when replacing a static, non-animated GIF.
Building the Transformation URL
Let's walk through a quick example. Say your original GIF lives at this URL:
https://media.pixel-fiddler.com/my-source/media/my-image.gif
To convert it to a JPEG, you simply slot in the format parameter f_jpg:
https://media.pixel-fiddler.com/my-source/media/f_jpg/my-image.gif
And that’s it. The image is now delivered as a JPEG. But just changing the format is only scratching the surface. The real magic happens when you start layering on other optimisations to get the output perfectly tuned for performance and quality.
By chaining parameters, you can resize, crop, and adjust quality all in a single request. This dynamic approach means you don't have to store dozens of different versions of the same image, which saves a ton on storage costs and makes your asset pipeline much cleaner.
You can easily stack multiple parameters to generate the perfect image for any context. Here are a few of the most common transformations I find myself using all the time:
- Adjusting Quality (
q_): This lets you control the compression level to find that sweet spot between file size and visual fidelity. I've foundq_80is a solid starting point for most web images. - Resizing by Width (
w_): You can set a specific width, and the API resizes the image while keeping the aspect ratio intact. For instance,w_600creates an image that's 600 pixels wide. - Cropping (
c_): This defines how the image should be cropped if the aspect ratio changes during a resize.
Let's combine these. Your new URL might look something like this:
https://media.pixel-fiddler.com/my-source/media/f_jpg,q_80,w_600/my-image.gif
This one URL now asks for a JPEG version of your GIF, sets the quality to 80, and resizes it to a width of 600 pixels. If you want to dive deeper into asset retrieval, we have a whole guide on how to download an image from a URL.
Practical Implementation in Code
Plugging this into your application is straightforward. Whether you’re working in a front-end framework or a back-end language, you just need to build the URL string programmatically.
Here's a quick JavaScript example of how you might do it:
const originalUrl = 'https://media.pixel-fiddler.com/my-source/media/my-image.gif';
const transformations = 'f_jpg,q_80,w_600';

// A simple way to inject the transformation parameters into the URL path
const urlParts = originalUrl.split('/media/');
const finalUrl = `${urlParts[0]}/media/${transformations}/${urlParts[1]}`;

console.log(finalUrl);
// Output: https://media.pixel-fiddler.com/my-source/media/f_jpg,q_80,w_600/my-image.gif
This dynamic approach to handling images is becoming the standard. The rise of specialised APIs for image processing is a direct response to developers needing scalable, automated solutions. Honestly, these tools have become essential infrastructure for any site or app managing a large amount of visual content.
Automating Image Conversions at Scale
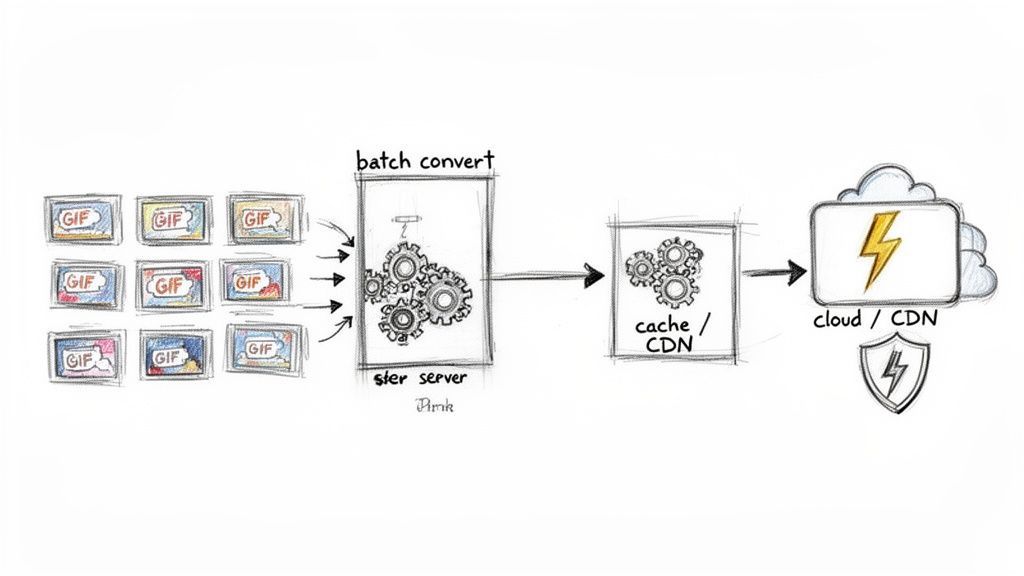
When you're dealing with a CMS or e-commerce platform holding thousands of images, converting files by hand just isn't an option. It's slow, tedious, and prone to error. The only sensible way forward is to build an automated workflow that can handle the load. This is precisely where programmatic URL generation shines, especially for your entire library of static GIFs.
Instead of tackling files one by one, you can whip up a simple backend script to generate PixelFiddler URLs dynamically. This lets you batch-convert your GIFs to JPEGs as they're uploaded or even run a one-time migration on your existing assets. The end goal is to serve every image in its most efficient format, all without a single manual click.
Building a Reliable Conversion Pipeline
Just generating URLs isn't enough; you need to build a system that's both fast and dependable. The secret sauce here is a solid caching layer, most commonly a Content Delivery Network (CDN). Once an image is converted, the CDN stores the resulting JPEG and serves it directly from an edge location on all future requests.
This setup gives you a few major wins:
- Fewer API Calls: The conversion API is only hit once for each image, which cuts down on processing overhead and potential costs.
- Blazing-Fast Delivery: Users get the cached image from a server close to them, which makes a huge difference in load times.
- A Better User Experience: Quick-loading images are non-negotiable for good web performance and keeping users happy.
Think of it like this: by putting a CDN in front of your image transformation service, you create a self-optimising delivery system. The very first visitor triggers the gif to jpeg conversion, and everyone after that gets the speedy, optimised result straight from the cache.
Handling Updates with Cache Invalidation
So, what happens when a source GIF in your asset library gets updated? It's a classic caching problem. The old JPEG will keep being served from the CDN until its cache expires or someone manually clears it.
This is where you need a smart cache invalidation strategy. Your backend script should be set up to send an invalidation request to the CDN whenever an original image is changed. This command purges the old version from the cache. The next time a user requests that image, the CDN will fetch a fresh conversion and cache the new JPEG.
Proper cache management ensures your users always see the latest content without slowing things down. This is a core part of improving site speed metrics, something we dive deeper into in our guide to mastering First Contentful Paint.
Improving Core Web Vitals with Faster Images
All that hard work automating your image workflows and setting up smart caching? This is where you see the payoff. The line between smaller images and better SEO isn't just theory; it’s a direct, measurable reality tracked by Google's Core Web Vitals.
These metrics are all about gauging a real user's experience on your site. When you swap a heavy static GIF for a streamlined JPEG, you're not just changing a file extension. You're making a strategic decision that directly boosts these crucial scores and, ultimately, your site's performance.
The impact on speed is something you just can't ignore. Performance is a feature. In fact, a study by Deloitte found that even a 0.1-second improvement in site speed can lift conversion rates by 8%. That makes every single millisecond you can shave off, starting with your images, incredibly valuable.
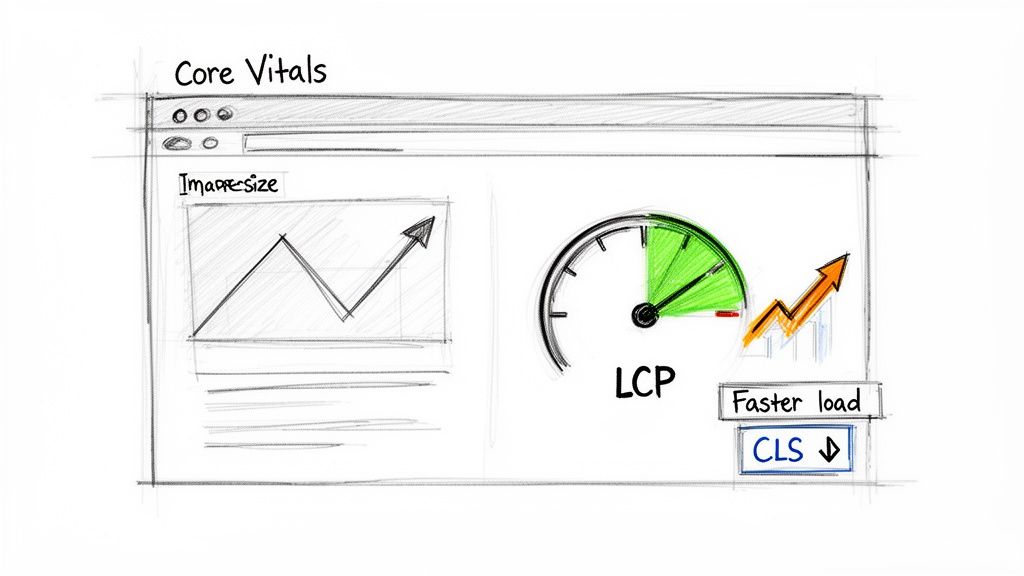
Boost Your Largest Contentful Paint Score
Largest Contentful Paint (LCP) is all about speed perception. It measures how long it takes for the largest visual element—usually a hero image or a big block of text—to appear on the screen. It's the primary signal to a user that the page is useful and actually loading.
A big, chunky static GIF used as a banner image can absolutely kill your LCP score. Why? Because the browser has to download the entire file before it can show anything, leaving your visitors staring at a blank space. Converting that GIF to JPEG slashes the file size, letting the browser download and render the image far more quickly. The result is a much healthier LCP time.
Speed Up First Contentful Paint
While LCP zeroes in on the biggest element, First Contentful Paint (FCP) is the starting gun. It marks the moment any content renders on the page. It's that first bit of visual feedback that reassures a visitor, "Yes, this page is working."
Even if your GIF isn't the LCP element, its hefty size can still create a bottleneck, hogging bandwidth and delaying other important assets like CSS or JavaScript. Switching it to a lightweight JPEG frees up that network capacity. This lets the browser get to the initial content faster, improving your FCP and the user's overall perception of your site's speed. If you want to go deeper on this, our guide to mastering First Contentful Paint has a lot more detail.
At the end of the day, faster images create a better user experience, and search engines reward sites that put users first. According to research from Google, visitors are 24% less likely to abandon a page if it meets the Core Web Vitals thresholds. That’s a powerful reason to get your images sorted.
Prevent Cumulative Layout Shift
Finally, let's talk about Cumulative Layout Shift (CLS), which is all about visual stability. This metric quantifies how much the content on your page unexpectedly moves around as it loads. We've all been there: you go to tap a button, and just as your finger lands, an image pops in above it, pushing everything down. It’s a frustrating experience, and CLS is what measures it.
While the file format itself doesn't directly cause CLS, proper image optimisation is a huge part of the solution. Unoptimised, slow-loading images are a common culprit for content reflow. By serving smaller, faster-loading JPEGs and making sure you reserve their space in the HTML (using width and height attributes), you ensure they appear quickly without shoving other elements out of the way. This simple habit leads to a stable, predictable layout and a much-improved CLS score.
Moving Beyond JPEG with Modern Formats
Swapping out a static GIF for a JPEG is a great move for performance, but honestly, it’s just scratching the surface. If you’re serious about squeezing every last kilobyte out of your images, the real conversation today is about next-gen formats like WebP and AVIF.
These formats were built from the ground up for the web, and their compression algorithms are in a different league. They can deliver images that look just as good as a JPEG, but at a fraction of the file size. That means faster load times, a better user experience, and a direct boost to your Core Web Vitals. It’s the holy grail of image optimisation: top-tier quality without the performance hit.
The Power of Automatic Content Negotiation
So, how do you start using these new formats without creating a headache for yourself dealing with browser support? This is where a smart image API like PixelFiddler really shines. Instead of manually checking which browsers support what, our service uses a neat trick called content negotiation.
It’s a simple but powerful idea. You can build your image URL to ask for a JPEG, but our system is clever enough to check if the user's browser can handle something better.
Here’s a look at what happens behind the scenes:
- You set up your image request using a parameter like
f_jpg. - A user visits your site, and their browser sends an
Acceptheader along with the image request, announcing that it supports WebP or AVIF. - PixelFiddler’s API intercepts this, instantly converts the image to the more efficient format, and sends that version back to the user.
You don't have to lift a finger. Your users get the smallest, fastest image possible for their specific browser, with zero extra development effort required from your team.
By automatically serving the best format, you're not just optimising for today's browsers but also future-proofing your assets. As new, even more efficient formats emerge, they can be seamlessly integrated into this delivery pipeline.
This hands-off approach lets your team focus on building great features, knowing that your images are already being delivered in the most optimised way for every single user. If you want to see this in action, you can check out our tools for converting PNG to WebP and PNG to AVIF.
This kind of intelligent, automated delivery is what a modern image strategy is all about—taking the guesswork out of performance for good.
Got Questions About GIF to JPEG Conversions?
You're not alone. When developers start optimising images, a few common questions always pop up. Let's clear up some of the most frequent ones I hear about switching from GIF to JPEG.
So, What Happens to My Animation When I Convert to JPEG?
The animation disappears completely. This is a big one to remember: the JPEG format simply doesn't do animation.
When you convert an animated GIF, the process grabs only the very first frame and saves that as a static JPEG image. All subsequent frames are discarded. If you absolutely need to keep the motion but are worried about the GIF's chunky file size, you’ll want to look at modern formats like animated WebP instead.
What's the "Magic Number" for JPEG Quality?
There isn't one, but there's a reliable starting point. Finding the right quality is all about balancing how good the image looks against how small the file is.
For most images on the web, a quality setting between 75 and 85 is the sweet spot. You get a massive reduction in file size without anyone really noticing a drop in visual quality. For things like big background images where detail isn't critical, you can often be more aggressive and drop it down to 60. The great thing about an API like PixelFiddler is you can just tweak the q_80 parameter in the URL and see the result instantly, letting you dial it in perfectly for each use case.
When Is It Better to Use PNG Instead of JPEG?
This really comes down to what's in the image.
- Go with JPEG for photos. If your original GIF is a photograph or has any kind of complex, multi-tonal imagery, JPEG is your best friend. Its compression algorithm is built for this and will give you a way smaller file.
- Stick with PNG for graphics. If the GIF has hard lines, text, or solid blocks of colour—like a logo—PNG is the way to go. Its lossless compression keeps everything perfectly crisp. The killer feature for PNG, though, is transparency. If you need a transparent background, JPEG is a non-starter.
From a pure performance standpoint, if transparency isn't a factor, converting a GIF to JPEG is almost always the right call for shrinking your page weight. We've got a much deeper dive into this in our guide comparing PNG vs JPG formats.
Can I Automate Converting a Ton of GIFs at Once?
Absolutely. In fact, this is where using an image processing API really shines. It’s built for exactly this kind of work.
You can easily write a script that iterates through your image assets, dynamically building a new URL for each one with the right transformation parameters (like adding f_jpg to the end). This turns the whole gif to jpeg conversion process into an automated, hands-off workflow. It’s perfect for big site migrations or handling user-uploaded content at scale without any manual effort.
Ready to speed up your website by getting your images in check? With PixelFiddler, you can automate your entire image workflow, from conversion to delivery. Get started for free and see the difference today.